You hit delete. You ran the wipe. But here’s the thing deleted doesn’t mean destroyed.
Studies show that up to 40% of secondhand drives still contain recoverable personal data. That’s photos, passwords, tax returns—all sitting there waiting for the wrong person.
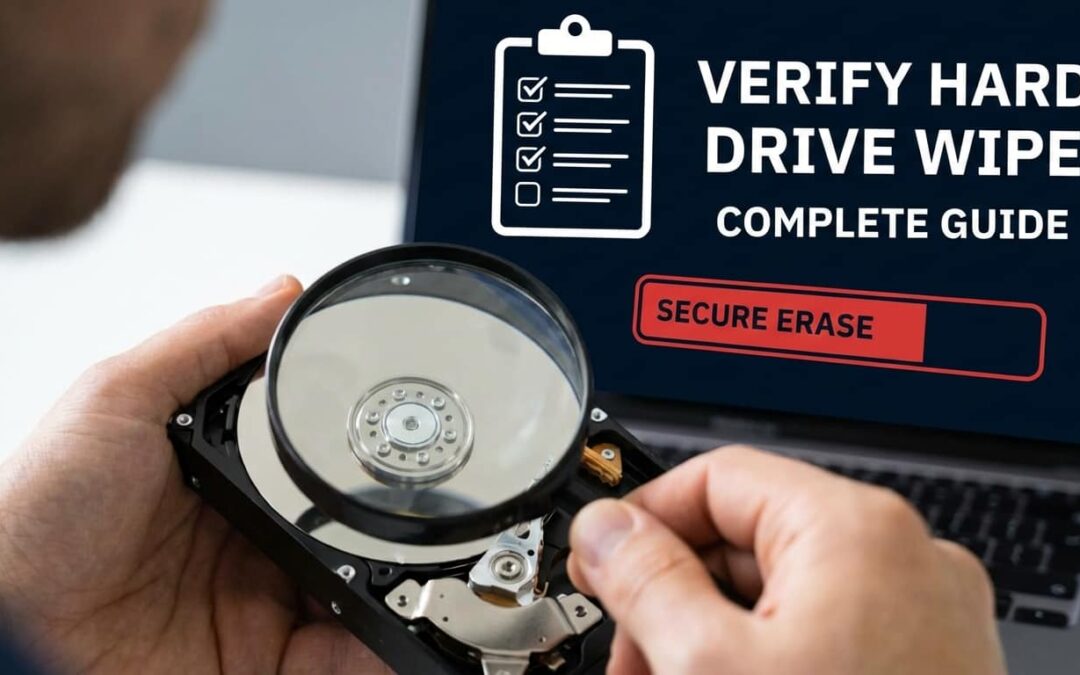
This guide shows you how to verify hard drive wipe success using real tools and proven methods. We’ll cover everything from quick Windows checks to advanced hex verification.
And if you’re in Phoenix, AZ, where tech resale and donation centers are everywhere? This matters even more.
Let’s make sure your data is truly gone.
What Does It Mean to Verify a Hard Drive Wipe?
Here’s what most people get wrong: deleted is not destroyed. Formatted is not forgotten.
When you verify a hard drive wipe, you’re confirming that no recoverable data remains on the drive. Not hidden. Not recoverable. Just… gone.
A verified wipe means:
- Recovery tools find nothing when scanning the drive
- Disk partitions show as unallocated or completely empty
- Hex viewers reveal only zeros (or random patterns from secure wipes)
- Wiping software logs confirm 100% completion with proper standards
This matters beyond just selling an old laptop. Think about hardware recycling centers, donation programs, and refurb shops—especially common in Phoenix, AZ. One unverified wipe could expose years of personal information.
You thought you wiped it. But part of you still wonders… did it really work?
Your old files aren’t just yours if you don’t double-check.
Overview of Successful Hard Drive Wipe Indicators
How do you know when a wipe actually worked? Look for these clear signals:
✓ Drive shows as “unallocated” in Disk Management No partitions. No file systems. Just raw, empty space.
✓ Data recovery software returns no results Tools like Recuva or TestDisk should come up completely empty.
✓ Hex view shows all zeros (or FF patterns) When you peek at the raw data, it’s nothing but 00 or FF values.
✓ Wiping software logs show 100% completion Your tool should confirm every sector was overwritten.
✓ No boot records or file system signatures remain The drive shouldn’t recognize itself as anything bootable.
SSDs behave differently—they might not “look” empty in traditional ways due to wear leveling. But a proper secure erase command still works.
When recovery tools find nothing, that’s your green light.
Don’t assume the bucket’s empty just because it looks dry.
Difference Between Delete, Format, and Wipe
Let’s clear this up once and for all.
| Action | What It Does | Is It Secure? |
| Delete | Hides files; marks space as available | ❌ No—data still exists |
| Format | Removes file system; quick cleanup | ❌ No—data recoverable |
| Wipe | Overwrites every sector with zeros or random data | ✅ Yes—when done right |
Deleting is like removing a sign from a door—not the stuff behind it.
When you delete a file, Windows just removes the directory entry. The actual data sits there until something overwrites it. Same with quick formatting. A real wipe? That’s different. It replaces every bit of data with zeros, random patterns, or military-grade overwrites. For SSDs, traditional overwriting doesn’t always reach every cell due to wear leveling. That’s why secure erase and sanitize commands exist—they work with the SSD controller to clear hidden areas too.
It only takes one missed step for private data to resurface. Don’t risk it.
Methods to Verify a Hard Drive Wipe
You ran the wipe. But how do you know it worked?
The truth is: trust, but verify—especially when your data’s at stake.
Visual cues aren’t enough. A drive can look empty but still hold recoverable files. That’s why you need multiple verification methods—some software-based, some manual, some for advanced users.
The right approach depends on:
- Your drive type (HDD vs SSD)
- Your technical comfort level (beginner to advanced)
- How sensitive your data is (personal files vs business records)
In Phoenix, AZ, where tech resale and e-waste recycling are common, unverified wipes create real risks. Donated computers. Sold laptops. Recycled office drives. All potential data leaks. Below, we’ll walk through six proven verification methods. Use at least two for confidence. Use three or more for sensitive data.
Here’s your verification toolkit:
Use Data Recovery Software (Recommended)
This is the easiest way to confirm a wipe. If recovery tools can’t find anything, neither can anyone else.
How it works: Recovery software scans for deleted files, lost partitions, and hidden data. If your wipe was successful, these tools return zero results.
Popular tools to try:
- Recuva (Windows, free) – User-friendly with deep scan options
- TestDisk (Cross-platform, free) – Recovers partitions and data
- Disk Drill (Mac/Windows, freemium) – Visual interface with preview
Quick test process:
- Download and install your chosen recovery tool
- Run a deep scan on the wiped drive
- Wait for scan completion
- Check results—no files found = successful wipe
If the tool recovers filenames but not actual content, that’s usually okay. But if you see full files with readable data? Your wipe failed.
When recovery tools come up empty, it’s a sign your wipe held up.
There’s nothing more satisfying than seeing zero results.
Check via Disk Management (Windows)
Want a quick visual check? Windows has a built-in tool that takes 30 seconds.
How to check:
- Press Win + X and select Disk Management
- Find your drive in the list
- Look at its status
What you want to see:
- Drive shows as “Unallocated” or “Not Initialized”
- No partitions listed
- No drive letter assigned
What’s wrong:
- Drive still shows partitions (C:, D:, etc.)
- File system listed (NTFS, FAT32, exFAT)
- Any used space showing
Important: This isn’t foolproof. A drive can show as unallocated but still contain recoverable data in the raw sectors. Use this as a first check, not your only check. If it still shows partitions, the wipe might have failed. Surprisingly simple this built-in tool can reveal if partitions remain. That tiny window might save you from a major privacy leak.
Use Hex Editors (Advanced)
Ready to go deep? Hex editors let you see the raw 0s and 1s on your drive. What hex editors do: They display data at the binary level. If your drive was properly wiped, you’ll see nothing but 00 (zeros) or FF (all ones) across every sector.
Popular hex editors:
- HxD (Windows, free)
- WinHex (Windows, professional)
- Hex Fiend (Mac, free)
How to verify:
- Open your hex editor
- Load the drive in read-only mode (critical!)
- Scroll through different sectors
- Look for patterns
What you want to see:
- Rows of 00 00 00 00 00 (zeros)
- Or FF FF FF FF FF (all ones)
- Consistent patterns across sectors
Red flags:
- Readable text strings
- File headers (like “MZ” for executables)
- Mixed data patterns
⚠️ DO NOT write to the disk! Always open in read-only mode.
It’s like popping the hood and checking every bolt.
There’s something deeply satisfying about seeing nothing but zeros.
Linux Command Line Verification (xxd or checksum tools)
Power users and Linux fans—this one’s for you.
Method 1: View raw data with xxd
sudo xxd /dev/sda | less
This dumps the raw hex data. If wiped correctly, you’ll see repeating null bytes (00) or random patterns.
Method 2: Generate checksums
# Before wipe – save this checksum
sudo sha256sum /dev/sda > before.txt
# After wipe – generate new checksum
sudo sha256sum /dev/sda > after.txt
# Compare
diff before.txt after.txt
What the results mean:
- Identical checksum = drive wasn’t actually wiped
- Different checksum = data changed
- All null bytes in xxd = successful zero-fill wipe
Bonus: Use a live USB You don’t need Linux installed. Boot from a USB stick with Ubuntu or Kali Linux. This lets you verify without loading your main OS.
If data is gone, the output is quiet. If it’s there, the shell will shout.
Want absolute proof your drive’s clean? Fire up the terminal.
Check Wiping Software Logs
Most professional wiping tools save logs. These logs are your receipt—proof the job got done.
Where to find logs:
- DBAN: Shows completion screen (screenshot it!)
- Eraser: Logs saved in program folder
- Samsung Magician / Intel SSD Toolbox: Built-in verification reports
- Manufacturer tools: Usually export to .txt or .log files
What a good log shows:
✓ Pass completion status – “Pass 3 completed – 100% sectors overwritten” ✓ Wipe method used – DoD 5220.22-M, NIST 800-88, etc. ✓ Sectors processed – Total count matches drive capacity ✓ No errors reported – Zero bad sectors or failures
Example log line:
dwipe: Operation successful – no bad sectors
Method: DoD Short (3-pass)
Status: 100% complete
If your log shows errors, partial completion, or mismatched sector counts? The wipe likely failed.
Logs are your paper trail. Without them, it’s just guesswork.
Unexpectedly detailed—logs give you what visuals can’t.
Bootable Media Verification (USB Boot Tools)
Sometimes you need to check a drive outside your main operating system. That’s where bootable tools shine.
Why boot externally? Your OS might cache data or interfere with verification. Booting from USB gives you a clean, isolated environment.
Popular bootable tools:
- Parted Magic – All-in-one disk management suite
- GParted Live – Partition editor with verification features
- Kali Linux – Includes forensic and recovery tools
- DBAN – Can verify its own wipes on completion screen
How to use:
- Create a bootable USB with your chosen tool
- Boot your computer from the USB
- Load the disk utility or forensic tool
- Scan the drive for partitions, data, or recoverable files
This method is common in Phoenix, AZ tech shops and refurb centers. Techs use bootable media to verify drives before resale or donation.
Don’t trust the lock until you’ve tested the door.
Why rely on the same OS you’re trying to erase?
SSD-Specific Verification Techniques
SSDs are different. Like, really different.
Why SSDs need special handling: SSDs use wear leveling and TRIM to manage data across cells. When you “overwrite” an SSD, the controller might write to a different physical location. Old data can remain in hidden areas.
Traditional overwriting doesn’t always work on SSDs.
Better options for SSDs:
✓ ATA Secure Erase command Tells the SSD controller to wipe everything, including hidden sectors.
✓ NVMe Sanitize command Similar to Secure Erase but for newer NVMe drives.
✓ Manufacturer tools:
- Samsung Magician – For Samsung SSDs
- Intel SSD Toolbox – For Intel SSDs
- Crucial Storage Executive – For Crucial SSDs
How to verify SSD wipes:
- Run the secure erase command via your manufacturer’s tool
- Check for success confirmation in the tool’s interface
- Follow up with hex viewer or recovery scan to double-check
- Use the manufacturer’s verification feature if available
Some SSDs report “success” even when the wipe didn’t fully complete. That’s why the follow-up check matters.
SSDs are like magic tricks—what disappears isn’t always gone unless you check behind the curtain.
With the right command, your SSD can vanish data better than any shredder.
5 Easy Steps to Ensure Your Hard Drive Is Completely Wiped Before Giving It Away
You’re ready to donate, sell, or recycle that old drive. Smart move.
But wait—did you actually wipe it right?
These five steps reduce risk and give you real peace of mind. Whether you’re dropping off at a Phoenix, AZ e-waste center or selling on Craigslist, this checklist keeps your data safe.
Save it. Wipe it. Check it. And if all else fails—smash it.
Step 1: Backup Your Data
Before you wipe anything, save what matters.
What to back up:
- Photos and videos – Family memories you can’t replace
- Documents – Tax files, resumes, legal records
- Browser passwords – Export from Chrome, Firefox, etc.
- Software licenses – Product keys for paid apps
Where to back it up:
- Cloud storage (OneDrive, Google Drive, Dropbox)
- External hard drive or USB stick
- Network-attached storage (NAS)
Once you wipe, there’s no going back. Recovery attempts are expensive and often fail.
To avoid future stress or data recovery prevention headaches, back up first.
A backup now is a rescue later.
Yes, that one random tax file from 2016—you’ll want it.
Step 2: Choose The Right Data Wiping Method
Not all wipe methods are equal. Match your method to your drive type.
For HDDs (traditional hard drives): Use multi-pass overwrite tools like DBAN. These physically overwrite data with zeros or random patterns.
For SSDs (solid-state drives): Use Secure Erase or Sanitize commands. These work with the SSD controller to clear all cells, including hidden ones.
Standards to consider:
- DoD 5220.22-M – 3-pass overwrite (older standard)
- NIST 800-88 – Current best practice for data sanitization
To ensure secure erase verification, match your method to the drive’s design.
SSDs need finesse. HDDs need brute force.
Step 3: Use Data Wiping Software
Now it’s time to actually run the wipe.
Recommended tools:
For HDDs:
- DBAN (Darik’s Boot and Nuke) – Free, bootable, thorough
- Eraser – Windows app with scheduling options
For SSDs:
- Samsung Magician – For Samsung SSDs
- Intel SSD Toolbox – For Intel drives
- Crucial Storage Executive – For Crucial SSDs
For Mac users:
- Disk Utility – Built-in, select “Security Options” for multi-pass wipes
How to use:
- Download from the official source only (avoid sketchy sites)
- Install and open the tool
- Select your drive
- Choose wipe method (DoD, NIST, or Secure Erase)
- Run the process
Most disk wipe verification tools include options to view process logs. Save or screenshot these for later.
Yes, even free tools like Eraser do the job right—if you follow instructions.
Step 4: Verify the Success of the Wiping Process
This is the step most people skip. Don’t be most people.
What “verified” means:
- Data is zeroed out (hex shows 00 or FF)
- No partitions or file systems remain
- Recovery tools find nothing
How to verify data wipe:
Option 1: Check the logs Your wiping software should generate a completion log. Look for 100% completion and zero errors.
Option 2: Run recovery software Use Recuva, TestDisk, or Disk Drill. Scan the drive. If nothing comes back, you’re good.
Option 3: Manual hex check Open a hex editor and spot-check sectors. All zeros = success.
Quick checklist:
- ✅ Log file shows completion
- ✅ Recovery scan returns no files
- ✅ Hex viewer shows null bytes
If your data’s really gone, why does a file recovery app still find stuff?
Think of it like checking your rearview mirror before merging—just in case.
Step 5: Physically Destroy The Data Media (Only if step 4 was unsuccessful)
Verification failed? Data’s still there? Time for the nuclear option.
⚠️ Only do this if:
- You can’t verify the wipe
- The data is extremely sensitive (business, legal, medical)
- You don’t need to reuse the drive
Destruction methods:
For HDDs:
- Drill through the platters (multiple holes)
- Professional shredding services
- Degaussing (destroys magnetic data)
For SSDs:
- Physical crushing (break the circuit board and chips)
- Incineration (high-temperature destruction)
In Phoenix, AZ: Many e-waste centers offer secure destruction services. They’ll certify the drive is unrecoverable.
Physical destruction offers the most reliable form of data recovery prevention.
When in doubt, take it out—permanently.
If you can’t erase the ink, burn the paper.
How Do I Verify That My Hard Drive Is Fully Wiped
Let’s bring it all together.
Verifying a hard drive wipe isn’t about one magic tool or single test. It’s about layering multiple methods until you’re certain.
Key verification signals:
- ✅ Wiping software logs confirm 100% completion
- ✅ Recovery scans return zero files
- ✅ Hex viewers show only null bytes (00 or FF)
- ✅ Disk management shows unallocated space
- ✅ Physical inspection (for drive destruction)
The smart approach: Start with easy methods (check logs, run Disk Management). Then move to deeper verification (recovery scans, hex checks). For SSDs, use manufacturer tools and secure erase commands.
If any method raises a red flag, don’t ignore it. Re-wipe or move to physical destruction.
Below, we’ll cover the technical standards, practical approaches, and community resources that define what “verified” really means.
A wipe isn’t secure until it’s checked—and double-checked.
You’re not guessing anymore—you’re certain.
1) The Standard That Defines ‘Verification’ (Authoritative)
Not all wipes are created equal. Official standards define what counts as truly secure.
| Standard | Type | Considered Secure? |
| NIST 800-88 Rev 1 | Current | ✅ Yes |
| DoD 5220.22-M | Legacy | ✅ Yes |
NIST 800-88 is the current industry best practice. It focuses on secure erase verification and data sanitization methods for modern drives, including SSDs.
DoD 5220.22-M is older but still respected. It defines multi-pass overwrites (3, 7, or more) for HDDs.
When to care:
- Data audits and compliance reviews
- Legal liability protection
- Enterprise or government policies
These standards guarantee what’s gone stays gone—like food safety labels for data.
Think of these standards like food safety labels—they guarantee what’s gone stays gone.
2) Practical Verification Approaches for ‘Secure Erase / Sanitize’ Commands
Secure Erase and Sanitize commands sound definitive. But how do you know they actually worked?
How these commands work: They’re executed via BIOS, manufacturer tools, or command-line utilities. They tell the drive controller to erase everything—including hidden sectors.
What success looks like:
- “Operation Completed Successfully” message in the tool
- Drive resets to factory state
- Manufacturer tool shows clean status
How to verify:
- Run the command (via Samsung Magician, Intel Toolbox, etc.)
- Check for success confirmation in the software
- Follow up with a hex check to spot-check sectors
- Scan with recovery software to confirm no files remain
Important warning: Some SSDs fake success. The tool says “done” but data lingers in over-provisioned areas. That’s why the follow-up scan matters.
Don’t trust the green check—trust the silence when recovery tools come up empty.
3) Verification for Overwrite-Style Wipes (DBAN & Logs)
Overwrite tools like DBAN physically replace data with zeros or random patterns. They work great on HDDs.
What DBAN shows on completion:
Example log output:
dwipe: Operation successful – no bad sectors
Method: DoD Short (3-pass)
Status: 100% complete
What to look for:
- ✅ “Pass completed” for each overwrite cycle
- ✅ Zero bad sectors reported
- ✅ 100% completion status
How to save the proof: Take a screenshot of the completion screen. Or check DBAN’s log file if you saved it to USB.
Follow-up verification: Even with clean logs, run a recovery scan or hex check. DBAN is reliable, but double-checking never hurts.
A DBAN log is like a receipt—you either have it, or you’re guessing.
Think of overwrite logs like a checklist from your mechanic—proof the job’s done.
4) Windows-Specific Resources (If Your ‘Wipe’ Is via Encryption + Reset)
Not everyone uses DBAN. Windows has built-in options that work—especially with BitLocker.
The method:
- Enable BitLocker on the drive (encrypts everything)
- Use “Reset This PC” in Windows Settings
- Select “Remove everything”
- Choose “Clean the drive” option (not quick reset)
Why this works: BitLocker encryption scrambles the data. When you reset and clean, the encryption key is destroyed. Even if someone recovers encrypted data, they can’t read it.
How to check BitLocker status: Open Command Prompt and run:
manage-bde -status
When to trust this:
- Home users with less sensitive data
- Drives that stay within a single user ecosystem
- Non-compliance scenarios
Still verify: After reset, boot from USB and run recovery scans. Check Disk Management to confirm unallocated space.
This is like locking the door before tearing down the house—extra peace of mind.
5) Helpful Explainers (Good Context, Not the Standard)
Need extra help? These resources break down drive wiping and verification for visual learners.
Recommended resources:
📹 YouTube tutorials:
- “How DBAN Works” by Tech Guides
- “Secure Erase for SSDs Explained”
💬 Blog guides:
- “What Is NIST 800-88?” simplified for non-techs
- “BitLocker vs DBAN: Which Should You Use?”
🧑💻 Tech forums:
- Reddit threads on r/DataHoarder
- StackExchange security questions
Why these help: They offer visual walkthroughs, real-world examples, and beginner-friendly language.
Important note: These are for context and learning—not compliance-level proof. Always verify yourself using the methods above.
Sometimes, a five-minute video clears up what five articles can’t.
6) Community Threads (Useful, but Treat as Secondary)
Forums and Reddit threads can be goldmines—or minefields.
Where to find them:
- Reddit: r/DataHoarder, r/techsupport, r/privacy
- StackExchange: Information Security section
- Tech forums: Spiceworks, Bleeping Computer
Pros:
- ✅ Diverse real-world situations
- ✅ Troubleshooting tips for specific drives
- ✅ Personal experiences with tools
Cons:
- ❌ Conflicting advice
- ❌ Outdated methods
- ❌ No formal verification
How to use them: Read threads for ideas and troubleshooting. But always cross-check with official standards (NIST, DoD) or manufacturer documentation.
Take it with a grain of salt—and a second opinion.
What These Resources Collectively Tell You (Quick Takeaway)
Here’s what all the verification sources agree on:
No single method is perfect. Multiple checks matter.
Your verified wipe should include:
- ✅ Software log showing completion
- ✅ Recovery scan coming up empty
- ✅ Hex viewer showing zeros (or consistent patterns)
- ✅ Standards-based method (NIST or DoD)
SSD vs HDD differences:
- HDDs: Overwrite tools work reliably
- SSDs: Use Secure Erase or Sanitize commands
Final rule: If compliance or high security matters, follow NIST 800-88. For personal use, combine logs + recovery scans + one manual check.
Wiping isn’t secure until it’s confirmed—twice.
Conclusion
Wiping a hard drive isn’t hard. Verifying it? That’s where most people drop the ball.
But you’re not most people. You’ve got the tools, the methods, and the knowledge to confirm your data is truly gone.