
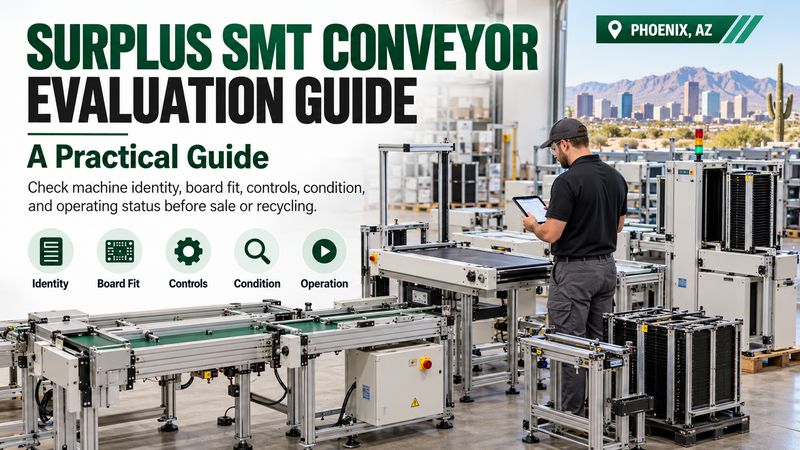
Surplus SMT Conveyor and PCB Handling Equipment Evaluation Guide
Evaluate surplus SMT conveyors by checking identity, board fit, physical condition, controls, and proven operation. Then compare likely sale proceeds against repairs, removal, and transport costs. That sequence helps you choose resale, parts recovery, or recycling with fewer surprises.
A conveyor can look clean and still stop an entire assembly line. Missing cables, worn rails, and locked controls can change its value quickly. A spinning belt proves movement, not production readiness.
For a Phoenix production manager, the task often starts during a line change. Equipment needs to leave, but maintenance still needs access and finance needs records. Measure twice, cut once applies here before anyone disconnects a cable.
This guide helps you build an honest evaluation package for surplus board handling equipment. It covers conveyors, magazine loaders, unloaders, buffers, and transfer units. Use the maker’s manual and qualified staff for machine-specific tests and safety decisions.
Identify Your SMT Conveyors and PCB Handling Equipment
Identify each unit by its maker, exact model, serial number, and actual production role. Those details let buyers check specifications and support without guessing. A photo of the nameplate beats a description like “old conveyor.”
SMT means surface-mount technology. This assembly method places electronic components directly onto a circuit board’s surface. PCB handling equipment moves boards between assembly, inspection, and storage steps.
A linking conveyor transfers boards between machines. An inspection conveyor can pause boards for an operator’s review. A buffer holds boards temporarily when neighboring machines run at different rates.
Loaders feed boards into the line, often from magazines. Unloaders collect them after a process step. Shuttles, turn units, and lift gates serve other movement or access needs.
Keep apples with apples when you create your inventory. A basic transfer conveyor and an automated magazine loader need different checks. Their condition, support needs, and likely buyers may differ too.
Record the equipment’s last line position and reason for retirement. A capacity upgrade tells a different story than repeated transfer faults. Share the reason plainly without turning an assumption into a diagnosis.
Build a Machine Inventory Before Requesting Quotes
Build an inventory that connects each physical machine with its specifications and included parts. One row per asset keeps mixed equipment lots understandable. Use a unique asset label that also appears in every photo folder.
Start with the following fields, then add details relevant to your machine. Keep unknown values marked “unknown” until someone verifies them. An empty cell should never quietly become a claim.
- Maker, model, serial number, and asset label.
- Manufacturing year, if the nameplate or records confirm it.
- Machine type, quantity, and last operating location.
- Board size range, transfer direction, and rail arrangement.
- Power supply details and compressed air requirements.
- Installed controls, software versions, and communication interfaces.
- Available manuals, spare parts, cables, and magazines.
- Current condition, known faults, and last test date.
Gather purchase records, maintenance notes, and removal approvals alongside that inventory. Check ownership before offering leased equipment or customer-owned tooling. This avoids an expensive misunderstanding after a buyer arranges collection.
Get your ducks in a row before contacting several buyers. Send everyone the same inventory version and photo package. That makes differences between offers easier to understand.
For connected computers, an IT asset inventory also helps identify storage and software. Keep that computer record separate from the conveyor’s mechanical specifications. The two records should share the same asset reference.
Measure Board Size, Rail Clearance, and Transfer Height
Measure board fit at the rails, then compare your findings with the exact machine manual. Include minimum and maximum board dimensions, thickness, weight, and component clearance. Document the installed configuration rather than copying another model’s brochure.
Record units clearly and keep millimeters separate from inches. Note the equipment’s current adjustment range and any mechanical limits. A maximum setting does not prove reliable transport at that setting.
Check Rail Width and Board Support
Rail width must support the intended board without binding, slipping, or catching components. Measure the usable range and inspect both rails for parallel movement. Include board-edge clearance and any fitted center support.
Measure twice, cut once matters when a board sits close to its width limit. In a hypothetical example, a 300 mm board needs verified usable clearance. A listing that says “about 300 mm” leaves an important fit question open.
Check underside clearance for populated boards and carriers. Tall parts, connectors, and fixtures may hit hardware below the transport surface. Record the actual constraint rather than calling the machine suitable for every board.
Confirm Transfer Height and Direction
Transfer height must match neighboring equipment within their permitted adjustment ranges. Measure from the floor to the board transport surface. Record the fixed rail position and the board travel direction too.
Make sure everyone is on the same page about left-to-right descriptions. State the viewing position and include an arrow on a machine photo. That small detail can prevent a costly layout mismatch.
Check leveling feet, rail extensions, and transfer gaps. A machine may fit the floor plan while leaving poor support between units. Have the receiving team confirm the complete transfer arrangement before purchase.
Inspect Belts, Rails, Motors, and Frames
Inspect transport parts for wear, damage, contamination, and missing hardware before planning powered tests. Cosmetic marks matter less than faults affecting board movement. Good photos should show both the overall machine and specific defects.
Look for cracked belts, frayed edges, uneven tension, and contaminated transport surfaces. Examine rollers, guides, pulleys, and rail adjustment screws where safely accessible. Record observations without claiming a cause you have not confirmed.
Check frames for bent sections, loose brackets, and signs of rough handling. Inspect leveling feet and approved lifting features. Fresh paint should not replace evidence about structural condition.
During an authorized operating test, note unusual noise, vibration, or uneven motion. Report when the symptom appears and what the machine was doing. A recording helps a technician assess the next inspection step.
Don’t judge a book by its cover. A dusty machine with complete records may deserve closer review. A polished unit with missing guards needs those gaps resolved first.
Avoid mixing visual findings with repair promises in the listing. “Belt edge frayed” describes an observation. “Only needs a cheap belt” assumes parts availability, labor, and successful repair.
Where the manual defines wear limits, record the applicable measurement and reference. Otherwise, seek a qualified assessment instead of inventing a pass threshold. Keep photographs dated so buyers understand the inspection’s timing.
Check Controls, Sensors, and Electrical Requirements
Check controls against the installed wiring and documentation before connecting power. Nameplate ratings should identify the required supply. A matching plug alone does not establish electrical compatibility.
Have qualified personnel review damaged cables, altered wiring, and uncertain grounding. Record modifications, replacement components, and missing labels. Keep electrical cabinets closed during ordinary sales photography unless authorized personnel provide safe access.
Verify Sensors and Operating Modes
Sensors must detect and release boards correctly in the modes you plan to describe. Check entry, stop, and exit behavior through the approved test procedure. Note missed detection, false alarms, and inconsistent stopping positions.
Leave no stone unturned when documenting intermittent faults. State the board type, operating mode, and conditions when a fault appeared. A vague “sometimes stops” gives buyers little useful evidence.
Test manual controls and installed inspection or bypass modes where appropriate. Record alarms and whether controls respond as documented. Do not describe unavailable functions just because the control panel includes a labeled button.
Confirm Power and Air Needs
Power and air requirements come from the exact machine’s documentation and installed configuration. Record voltage, phase, frequency, and current ratings where provided. For pneumatic equipment, record the maker’s pressure and air quality requirements.
Don’t put the cart before the horse by arranging a demonstration without suitable utilities. Check connection needs and site permissions beforehand. Do not improvise adapters, wiring changes, or pressure settings to make equipment appear operational.
Document missing power leads, air fittings, and external control boxes. Separate required items from optional accessories. Buyers need those differences to plan commissioning and compare the true purchase cost.
Verify SMEMA and Hermes Line Compatibility
Verify line compatibility through documentation and a controlled transfer test with suitable neighboring equipment. Connector appearance does not prove successful communication. Board fit and electrical signaling both need attention.
SMEMA commonly supports board handover between machines. Record the interface fitted on your unit and the available cables. Have qualified staff confirm wiring against the applicable documentation before connecting different machines.
The Hermes Standard supports richer board data exchange between SMT machines. Its official name is IPC-HERMES-9852. Record the supported implementation and enabled features instead of using “Hermes ready” without evidence.
Don’t assume an Ethernet port proves Hermes support. The port could serve programming, service, or another network function. Ask the maker or review the installed software documentation when the purpose is unclear.
The proof is in the pudding during an actual handover. Check that the receiving unit permits transfer before the sending unit releases a board. Record blocked exits and ordinary restart behavior through the approved procedure.
A working interface on one line does not prove every future pairing. Changes in configuration, software, and hardware may affect integration. State exactly which connection was tested and which connections remain untested.
What good is a conveyor that runs alone but cannot hand off a board? Buyers need a clear answer before they schedule installation. Include interface photos, cable details, and test notes in the sale package.
Evaluate Loaders, Unloaders, Buffers, and Transfer Units
Evaluate each handling unit against its specific job and installed accessories. A loader’s lift mechanism needs different evidence from a simple belt conveyor. Keep the assessment tied to the machine’s actual design.
For magazine loaders and unloaders, verify magazine fit, board slot spacing, and lift movement. Check indexing, board transfer, and installed detection functions. List the magazines included in the sale rather than assuming buyers have compatible ones.
For buffers, document supported board sizes and the installed storage arrangement. Record how boards enter, wait, and leave during a representative test. Note any restrictions on populated boards or carriers.
Transfer units need checks matching their movement and guarding arrangements. Shuttles, turn units, and lift gates can introduce alignment and access issues. Confirm stops, travel limits, and interlocks through the maker’s approved procedures.
Use the right tool for the job when describing test coverage. A short belt test does not establish a loader’s full operating condition. State which magazine, board, and operating mode the demonstration used.
Check spare magazines and fixtures for damage and correct identification. Mixed accessories can make a complete lot look more useful than it is. Separate compatible parts from items that merely arrived in the same storage area.
Before bundling everything together, record each unit’s condition independently. A strong conveyor should not hide an untested buffer. Buyers can then price the package with fewer assumptions.
Plan a Safe, Documented Operating Demonstration
Plan the demonstration with qualified personnel, approved procedures, and suitable test boards. Review hazards and access before testing begins. Never bypass guards or safety devices to complete a sales video.
OSHA’s hazardous energy standard, 29 CFR 1910.147, addresses covered servicing and maintenance activities. Follow applicable energy control procedures when inspecting or servicing equipment. A stop button alone does not establish safe isolation.
Keep powered operating demonstrations separate from work requiring hazardous energy control. Use the maker’s instructions and the site’s safety program. Stop testing when a fault or unsafe condition needs further assessment.
Better safe than sorry applies when equipment has an uncertain history. Do not energize damaged or unidentified machinery just to improve a listing. An honest untested designation is better evidence than an unsafe demonstration.
Agree on the demonstration’s scope before it starts. Identify the machine, test board, operating mode, and qualified person responsible. Use representative boards or carriers that the machine is designed to handle.
Record the date and conditions alongside the results. Note what passed, what failed, and what nobody attempted. Do not turn a short demonstration into a claim about long-term reliability.
If the test cannot cover a required function, say why. Missing utilities, absent cables, and unavailable magazines are useful facts. They help buyers plan further checks without confusing unknown condition with confirmed failure.
Capture Test Evidence Buyers Can Actually Use
Capture evidence that connects the machine’s identity with observable operating results. One clear video can answer questions that polished photos cannot. It should show the unit being evaluated without exposing confidential production information.
Start with the asset label and nameplate. Show the overall machine, installed controls, and relevant accessories. Then record the agreed operating sequence from a safe viewing position.
Useful evidence includes board entry, transport, stopping, release, and exit. Where appropriate, include the handover with neighboring equipment. Keep test conditions visible or explain them in the accompanying notes.
Show known faults instead of editing them out. Record a failed transfer, warning message, or inconsistent stop when safe to do so. Buyers can make better decisions when the evidence matches the written description.
Trust but verify applies to both sides of the sale. Keep original files and note any shortened viewing copies. A video from another machine or an older configuration does not verify today’s asset.
For test notes, include the board dimensions and selected operating mode. Record the observed cycle count rather than inventing a universal minimum. The right test duration depends on the machine, symptoms, and intended assessment.
Keep three evidence categories separate: observed results, maintenance history, and seller statements. A service invoice shows completed work. It does not automatically prove present condition after storage or later modifications.
Describe Condition Without Overpromising
Describe condition using specific evidence and clearly stated limits. “Tested working” needs a test date and defined functions. “Powers on” establishes far less and should remain a separate description.
Use practical labels that buyers can understand without a sales pitch. Explain your labels because equipment sellers may use different definitions. The following categories are suggested descriptions, not a formal grading standard.
- Tested for stated functions, with dated evidence.
- Powers on, with transport or transfer functions unverified.
- Untested because suitable power or accessories were unavailable.
- Repair required, with known faults identified.
- Parts recovery only, with reusable components listed separately.
Call a spade a spade when describing missing parts. List absent guards, cables, magazines, and control boxes directly. Don’t hide those details beneath “normal wear” or “sold as seen.”
Explain whether a machine was tested before or after disconnection. Removal and transport can change condition, especially around rails and controls. Buyers need the timing to interpret the evidence fairly.
Avoid promising commissioning success at an unknown receiving site. The buyer still needs to verify utilities, layout, and line integration. A clear condition report reduces uncertainty without pretending to remove every risk.
Who wants to discover a missing control cable after the truck leaves? A signed accessory list can prevent that problem. Match the list against the actual shipment before collection ends.
Protect Software, Recipes, and Stored Business Data
Protect stored information by identifying every computer, controller, and removable storage device in the lot. Some basic conveyors hold little business data. More complex systems may retain recipes, logs, credentials, or network settings.
Ask the equipment owner and authorized technical staff what each device stores. Check industrial PCs, memory cards, and connected operator terminals where fitted. Avoid assuming that every controller needs the same sanitization method.
Keep your cards close to your chest when handling customer programs and production records. Save approved operational backups securely before any authorized removal. Share only the documentation buyers need to assess the equipment.
Do not delete machine software blindly. Removing programs or controller settings can stop equipment from functioning. Plan data handling with the owner, technical staff, and any contractual requirements in mind.
Record software versions, license terms, passwords under authorized control, and transfer restrictions. Confirm whether licenses can move with the machine. A working installation does not prove the next owner has usage rights.
Ask about data handling records when storage devices leave your control. Agree on the required service and evidence before collection. Do not claim certified destruction or a specific compliance outcome without verified supporting records.
For machines without relevant storage, state the assessment basis. A simple documented finding helps close the question. It also avoids selling unnecessary data services for equipment that does not need them.
Estimate Resale Value and Compare Net Offers
Estimate value from documented condition, buyer demand, compatibility, and the costs needed to complete the sale. Original purchase price alone says little about today’s recovery. Neither age nor scrap weight provides a complete answer.
Compare genuinely similar equipment where reliable evidence exists. Match model, configuration, condition, accessories, and sale terms. Asking prices show seller expectations, while confirmed transactions provide different evidence.
There is no verified universal price range for surplus SMT conveyors in this guide. A useful quote requires your equipment details and current buyer interest. Treat any early estimate as provisional until someone reviews those facts.
Don’t count your chickens before they hatch when reading a high offer. Determine whether the price changes after inspection or loading. Ask which faults, missing parts, or access problems could trigger deductions.
Calculate net recovery by subtracting your agreed selling costs from the purchase payment. Include repairs, testing, packing, loading, freight, and commissions where applicable. Avoid subtracting a cost twice when the buyer already included it.
For illustration only, a hypothetical offer is $1,800 before seller-paid removal costs. If those costs total $600, the remaining recovery is $1,200. These figures demonstrate arithmetic and are not market prices or a JHI quote.
A lower headline offer could leave more money after collection. Compare payment timing and responsibilities alongside the final amount. Clear terms often matter more than an impressive opening number.
Choose Direct Sale, Consignment, Auction, or Recycling
Choose a selling route by weighing recovery, timing, effort, and the equipment’s condition. No route wins for every machine. Your removal deadline may matter as much as the advertised sale price.
A direct equipment buyer may offer a simpler transaction with fewer sales tasks. Confirm inspection terms, payment timing, and collection responsibilities. Ask whether the buyer wants the complete lot or selected assets.
Consignment or brokerage can provide access to other buyers. It may also involve waiting, commissions, storage, and changing offers. Put authority to accept a price and responsibility for unsold assets in writing.
Auctions can suit a broader clearance with a firm sale schedule. Review fees, reserve terms, loading arrangements, and buyer collection rules. Auction exposure does not guarantee a particular result.
Don’t put all your eggs in one basket by relying on one unverified price. Compare suitable industrial surplus buyers near Phoenix using the same equipment package. Focus on experience relevant to industrial assets and the proposed transaction.
Parts recovery or recycling may fit damaged, incomplete, or unsupported equipment. Ask whether reusable units should remain intact before dismantling begins. A scrap decision can remove options that existed while the machine was complete.
For a wider sale plan, review how to sell surplus items. Use that process alongside this machine-specific evaluation. Agree on the route only after comparing likely net recovery and practical removal needs.
Request a Free Evaluation With a Complete Equipment Package
Request an evaluation by sharing the inventory, condition evidence, photos, and removal deadline together. That gives the reviewer useful facts from the start. It also reduces repeated questions about identity and missing accessories.
JHI’s surplus electronics service covers industrial electronic surplus evaluation. Describe your SMT conveyors and handling units specifically when making contact. Confirm interest in the exact equipment before arranging a visit or transport.
Put all your cards on the table about faults and site constraints. Include units that do not power on and accessories you cannot locate. A realistic review starts with the equipment you actually have.
A strong request includes the machine list and clear nameplate images. Add operating evidence, installed options, and the included parts list. State whether the machines remain connected, are disconnected, or are already packed.
Explain whether you need the whole lot removed together. Mention any linked production equipment or restricted collection windows. Do not assume an evaluation includes rigging, freight, or guaranteed purchase.
Request your free surplus equipment evaluation from JHI at (602) 272-4033. Share your inventory, photos, and preferred removal date. Ask for written confirmation of purchase interest, pickup scope, and any charges.
A free evaluation and free collection are different services. Confirm each term for your particular machinery and location. That simple distinction helps prevent surprise costs when pickup day arrives.
Prepare Surplus Equipment for Removal in Phoenix
Prepare removal around the machine’s approved handling instructions and the building’s access limits. Confirm who disconnects, packs, lifts, loads, and transports each unit. Do that before anyone books a truck.
Document machine dimensions, weight, and approved lifting points from reliable records. Include the packed dimensions when a crate or pallet changes the footprint. Have the handling provider verify uncertain values before planning the move.
Check doors, aisle turns, floor changes, and loading access. Share dock details, operating restrictions, and available handling equipment. A pallet jack, forklift, or liftgate must suit the actual load and site.
Don’t leave it until the last minute when a line must clear. Coordinate maintenance, facilities, security, and the collection team early. Each group controls a different part of the removal.
Phoenix storage and loading plans should account for heat, dust, and outdoor exposure. Follow the maker’s storage limits and suitable packing guidance. Avoid claiming that desert storage is harmless just because conditions seem dry.
For collections in Tempe, Mesa, Chandler, or Glendale, give the actual pickup address. Ask the provider to confirm coverage and travel costs. Nearby location alone does not establish free collection or a service commitment.
Label loose cables, brackets, and magazines against their parent asset. Photograph the secured machine and packed accessories before release. Keep the signed collection record with the sale documents.
Confirm Payment, Pickup Scope, and Transfer Records
Confirm the agreement in writing before equipment leaves your facility. The record should identify the buyer, seller, assets, price, and responsibilities. Keep a final copy accessible to the person supervising collection.
List serial numbers and included accessories against each asset. State whether the transaction covers the whole lot or individual units. Identify any exclusions that could otherwise create confusion during loading.
Get it in black and white when discussing fees and deductions. Clarify inspection rights, payment timing, taxes where applicable, and cancellation terms. Assign responsibility for packing damage and transport through the agreed commercial terms.
Confirm whether a third-party carrier will collect the equipment. Give site staff the approved collection details through your usual process. Match the arriving team and paperwork before releasing the assets.
If recycling forms part of the job, specify the records you require. Ask how equipment and any data-bearing devices will be tracked. Distinguish collection receipts from evidence of completed processing.
Keep confidential material out of routine shipment photographs and buyer-facing paperwork. Production screens, customer labels, and storage devices may reveal more than expected. Review the package before sharing it outside your organization.
After collection, reconcile the released assets against the signed list. Resolve missing accessories and quantity differences promptly. Close the inventory record only when the physical transfer and agreed documentation match.
Use This Final SMT Equipment Evaluation Checklist
Use the final checklist to identify open questions before accepting an offer. A checked box should point to evidence, not confidence alone. Mark unresolved items clearly and decide who will resolve them.
- Identity matches the nameplate, asset label, and sale record.
- Ownership and authority to sell are confirmed.
- Board size and clearance limits have documented support.
- Rail width, transfer height, and direction are recorded.
- Belts, guides, frames, and accessories have condition notes.
- Power and air requirements match verified documentation.
- Sensors and stated operating modes have dated test evidence.
- Line interfaces are identified and test limits are disclosed.
- Software rights and stored data have been reviewed.
- Known faults and untested functions appear in the description.
- Payment, deductions, and collection duties are written down.
- Packing, loading access, and included parts are confirmed.
Cross your t’s and dot your i’s before signing. A complete checklist does not guarantee a buyer or a price. It gives everyone a clearer basis for the next decision.
Keep the evidence package as a snapshot of the evaluated condition. Update it if equipment is repaired, moved, dismantled, or stripped for parts. An old report can become misleading even when nobody intended to mislead.
The checklist also helps separate an urgent removal problem from a sale opportunity. Some assets justify additional testing, while others need a practical recovery route. Make that choice from the facts available for each machine.
Get Your Phoenix Surplus SMT Equipment Reviewed
Get your equipment reviewed while its identity, accessories, and condition are still easy to document. Start with the inventory and safe visual inspection. Add qualified testing only where it is appropriate and useful.
A clean slate starts with a clear plan for each asset. Some machines may suit resale, while others may suit parts recovery or recycling. The right next step depends on evidence, buyer interest, and removal costs.
Jay Hoehl Inc. has handled industrial electronic surplus since 1980. Its contact page offers a free evaluation of surplus industrial electronic material. Ask the team to review your specific conveyors, loaders, and handling equipment.
JHI lists its address as 3334 W McDowell Rd, Unit 17, Phoenix, AZ 85009-2414. Published hours are Monday through Friday, 8:00 a.m. to 4:30 p.m. Public access is by appointment only, so call before visiting.
Request an evaluation or discuss a pickup at (602) 272-4033. Have your machine list, photos, known faults, and preferred collection date ready. Confirm equipment acceptance, sale terms, and removal responsibilities before committing.
A documented assessment helps you protect usable equipment and plan a calmer collection day. It also gives your team a record of what left and why. That is a practical result worth preparing for.