
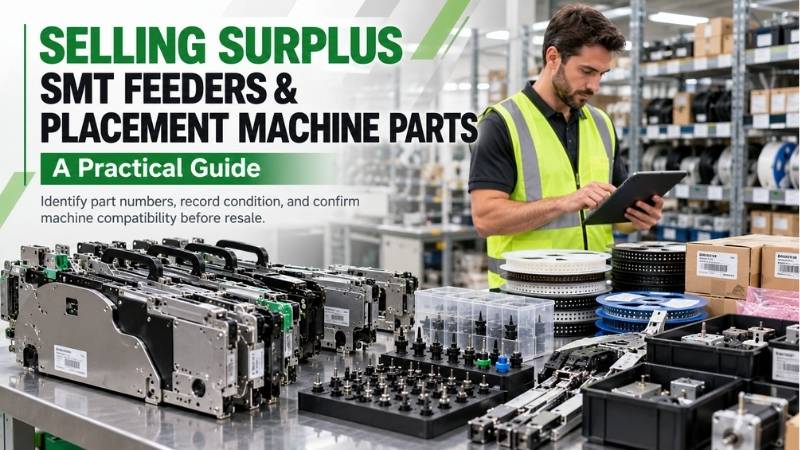
Selling Surplus SMT Feeders and Placement Machine Parts
Selling surplus SMT feeders starts with identifying each unit, recording condition, and confirming machine compatibility. Then compare offers using your expected proceeds after fees, testing, packing, and freight. Keep usable parts separate from scrap until a qualified buyer reviews them.
Maybe your Phoenix plant replaced a placement line last quarter. The old machine left, but several feeder carts stayed behind. Maintenance saved some spares, purchasing kept others, and nobody owns the cleanup. Now you need floor space without giving away useful equipment.
That situation needs a clear inventory and a sensible sales plan. A feeder can still serve another production line after yours moves on. But a familiar brand name alone doesn’t establish demand, working condition, or fit.
Good records bridge the gap between your warehouse and the buyer’s production needs. They show what someone can inspect, use, or evaluate further. That makes the conversation easier for both your maintenance team and purchasing contact.
Start with identification, then discuss price. A little homework goes a long way. This guide helps you prepare a defensible lot, compare buyers, and arrange the handoff.
Which SMT feeders and placement parts should you review for resale?
Review identifiable feeders and machine parts that another operator could use, repair, or keep as spares. Start with complete assemblies before sorting small loose pieces. Don’t assume everything from a retired line belongs in the same scrap bin.
SMT stands for surface-mount technology. Placement equipment positions components on circuit boards during assembly. Feeders present components for pickup, making their identity and condition important to buyers.
Your review list may include these groups:
- Tape feeders, tray units, and other component supply assemblies.
- Placement heads, nozzle holders, and identified nozzle sets.
- Motors, sensors, cameras, and machine control assemblies.
- Feeder carts, storage racks, and setup accessories.
- Unused service spares with readable manufacturer labels.
Treat that list as an inventory starting point, not guaranteed buyer acceptance. Each buyer needs to confirm its interest in your exact items. An isolated part may have little demand despite belonging to a valuable machine.
Match accessories with their parent assemblies when you can. Keep brackets, cables, and labeled hardware together without hiding their individual identities. A complete set may answer more buyer questions than several unexplained boxes.
Don’t count your chickens before they hatch. Separate potential resale value from confirmed purchase offers. Your first goal is finding what you actually have and what remains usable.
Decide what your plant can release before contacting buyers
Release only equipment that production, maintenance, and the asset owner agree your business can sell. Check those approvals before advertising or scheduling collection. A quick sale can become expensive if another active line still needs the spares.
Ask maintenance to identify critical backups for machines still running. Ask production about planned transfers, prototype work, and upcoming product changes. Then ask the asset owner about customer-owned or borrowed equipment.
Use three practical groups: approved for sale, reserved for operations, and awaiting clarification. Physically label each group and mirror those labels in your inventory. Keep the reserved group outside the pickup area.
Common reasons for excess stock include line upgrades, canceled programs, and duplicate purchasing. Our guide explains why companies end up with surplus electronics. Use that background to identify recurring problems behind this particular cleanout.
Set a firm review date for items awaiting clarification. Otherwise, the same boxes may sit through another inventory count. Give one person responsibility for resolving questions and updating the release list.
Look before you leap. Keep enough verified spares for your operating needs before selling the balance. A signed release list protects the warehouse team from conflicting instructions on pickup day.
Identify exact part numbers and machine compatibility
Identify each feeder by its manufacturer, complete part number, revision, and documented machine connection. Brand and tape width alone don’t prove compatibility. Two similar units can require different interfaces or support different operating conditions.
Start with the physical label. Record every character, including suffixes, spaces, and revision marks. Photograph the label beside the inventory reference so buyers can check your transcription.
Record these details when available:
- Manufacturer and feeder family.
- Complete part number and revision.
- Serial number or your internal asset identifier.
- Marked tape width and supported feed pitch.
- Source machine model and supporting records.
- Electrical connections and included adapters.
Use manufacturer documentation to confirm technical fit. For example, Yamaha’s Auto Loading Feeder specifications list 8 mm tape and 2/4 mm feed settings. That page also specifies compatible YS, YSM, and YRM machines with tape cutters. These details describe that product, not every Yamaha feeder.
Document uncertainty instead of filling gaps from memory. Write “source machine unknown” when records don’t establish the connection. Write “label partly unreadable” and attach a close photograph when characters remain unclear.
A matching connector or housing doesn’t settle the question. Ask the buyer to confirm the exact application before accepting compatibility claims. Measure twice, cut once. A few minutes spent checking identity can prevent a costly return discussion.
Build an inventory buyers can quote without guessing
Build a simple inventory with one row for each distinct part and condition group. Track individual serial numbers when you have them. Buyers should understand the lot without calling you about every photograph.
Think of the inventory as each item’s passport. It connects identity, history, condition, and location. A pile of pictures without that connection leaves too much room for confusion.
Include the following fields:
- Lot reference and storage location.
- Manufacturer, part number, and revision.
- Quantity and individual serial references.
- Condition category and known faults.
- Source machine and removal date, if known.
- Test date, method, result, and supporting filename.
- Included accessories and missing pieces.
- Packed dimensions and weight, once measured.
Keep original part numbers in a text field. Spreadsheet software can remove leading zeros or change long numbers. Check the exported file before sending it outside your company.
Split mixed conditions into separate rows. Ten tested units and five untested units aren’t fifteen tested units. Likewise, keep complete assemblies separate from stripped donor assemblies.
For example, assign one lot reference to twelve matching feeders with consistent records. Assign another reference to three similar units with damaged connectors. This example shows grouping logic, not a recommended lot size.
A useful description could read: “Twelve used feeders, photographed individually, with source machine records available. No powered testing was performed after removal. Two units have visible housing damage, identified separately in the photo register.”
That example describes evidence without inventing a technical result. Replace every detail with facts from your own stock. Keep the damage record tied to specific units even when quoting the group together.
Keep your ducks in a row. Save one dated master inventory and share copies from that version. When a quantity changes, tell every buyer using the earlier list.
Describe condition with evidence buyers can check
Describe what you inspected or tested, then state what remains unknown. “Looks good” doesn’t establish reliable operation. A precise condition note helps a buyer estimate further work without assuming you performed it.
Use clearly defined categories throughout the lot:
- Unused surplus: no known service use, with packaging and storage history described.
- Tested used: the stated checks passed on the recorded date.
- Untested used: operation hasn’t been verified for this sale.
- Faulty or incomplete: known problems or missing parts are disclosed.
- Repair donor: offered for recoverable parts without a working claim.
Unused stock still needs inspection. Look for damaged packaging, corrosion, missing accessories, and unclear labels. A sealed box supports a packaging claim, but doesn’t automatically prove its contents or condition.
Keep “removed from a working line” separate from “tested after removal.” Those statements describe different evidence. Include the removal date and available maintenance history without implying a current performance guarantee.
Think of your condition report as a receipt for the claims you make. Each statement should connect to a photograph, inspection note, or known history. Leave unsupported assumptions out, even when they sound likely.
Check visible connectors, housings, mounts, and accessible moving parts without forcing them. Record bent contacts, cracked covers, loose fittings, and signs of prior repair. Let qualified personnel handle powered checks under the relevant service procedures.
Honesty is the best policy. A disclosed fault may still interest a repair buyer. An undisclosed fault can turn a straightforward sale into a dispute about expectations and payment.
Decide whether testing or repair is worth the effort
Test or repair surplus only when the likely benefit justifies the cost and risk. Start by asking interested buyers which evidence affects their offer. Their answer may save your maintenance team from unnecessary work.
A useful test record identifies the unit, equipment used, procedure, date, and result. It also identifies the person or service provider performing the work. Avoid broad claims such as “fully calibrated” without records that support them.
Manufacturer service requirements differ. Tape indexing, sensor behavior, and wear may require specialized inspection equipment. A successful power-on check alone doesn’t prove every operating function meets its requirements.
Don’t improvise a repair solely to improve the listing. Unapproved lubricants, forced adjustments, or aggressive cleaning can create additional problems. Follow the manufacturer’s instructions and keep any service report with the inventory.
For a repair decision, compare the expected additional proceeds against all additional costs. Include diagnosis, replacement parts, labor, shipping, and the chance that repair fails. Use actual estimates from the parties involved rather than optimistic resale listings.
If buyers prefer evaluating untested units themselves, price that route too. You may accept less gross revenue while avoiding uncertain repair spending. Don’t throw good money after bad. The best outcome depends on the lot, demand, and your deadline.
Take photos that answer the buyer’s next question
Take photographs that establish identity, quantity, condition, and what comes with each lot. Start with an overview, then move closer. Buyers need enough detail to connect the physical items with your inventory.
Capture these views for each distinct group:
- The full lot with its inventory reference visible.
- A readable manufacturer label and any revision markings.
- Both sides of representative units.
- Connectors, mounting points, and accessible wear areas.
- Every disclosed defect or missing assembly.
- Included cables, holders, and other accessories.
Avoid relying on one polished example to represent a mixed lot. Photograph any exceptions separately and identify the affected units. Otherwise, buyers may assume the whole shipment matches the cleanest feeder.
Use a plain background and enough light to read markings. Keep customer documents, passwords, and production screens out of view. Don’t obscure manufacturer identification while removing confidential background details.
Name files with the same references used in your inventory. For example, “Lot-A-label” should clearly belong to Lot A. Keep the original photographs so you can resolve later questions about condition.
A picture is worth a thousand words when it answers a real question. Good photographs reduce uncertainty, but they don’t replace testing. Label any operating video with its date and the specific unit shown.
What determines the value of used SMT feeders?
Value depends on exact identity, current demand, verified condition, completeness, and selling costs. Age alone doesn’t settle the price. A buyer needs a realistic use or resale path for the particular equipment.
Why price a complete feeder only by its weight? Its remaining service use may matter more than recovered material. But resale interest must come from an actual buyer, not your original purchase invoice.
Compare these factors when discussing offers:
- Demand for the exact part number and revision.
- Supported machine applications and available documentation.
- Test evidence, repair history, and visible wear.
- Included accessories and the cost of missing parts.
- Quantity, consistency, and storage condition.
- Packing, transport, inspection, and selling fees.
Original purchase cost provides background, not a current market valuation. Advertised asking prices also differ from completed sales and firm offers. Compare like-for-like items before using any listing as a reference.
Get written offers against the same inventory version. Ask whether the amount is firm or subject to inspection. Identify the findings that could change it and how disagreements would be handled.
Keep your feet on the ground. No universal price per feeder fits every brand, model, and condition. A defensible offer explains what the buyer is purchasing and what remains conditional.
Compare net proceeds instead of the headline offer
Compare the money you expect to keep after agreed costs, deductions, and required work. The largest quoted amount may not produce the best result. Timing and uncertainty also matter when your plant needs the space.
Use this simple calculation:
Estimated net proceeds = offer minus seller-paid costs and agreed deductions.
Consider a purely hypothetical comparison. Buyer A offers $4,000, with $600 freight and $250 packing paid by you. That leaves $3,150 before any other costs. Buyer B offers $3,400 with those services included, leaving $3,400.
These numbers demonstrate the calculation only. They aren’t current SMT prices or a JHI quotation. Actual offers depend on your inventory, buyer interest, inspection results, and written terms.
Compare payment timing alongside the arithmetic. An inspection-dependent offer has different uncertainty than an accepted purchase after inspection. Ask when payment becomes due and what evidence confirms receipt.
Also include the work your team must perform. Counting units, sourcing crates, and arranging loading consume time. Use your own internal costs when deciding whether a higher offer justifies extra work.
Set a decision deadline that reflects your removal needs. Ask whether the offer remains open until that date. If payment follows inspection, ask how long inspection takes and when you receive its findings.
Consider two possible outcomes before choosing: the quoted condition is accepted, or material differences appear. For each outcome, establish your costs and options. This helps you compare uncertain offers without treating every possible deduction as inevitable.
The devil is in the details. Review rejected-item handling, return freight, and deductions before releasing equipment. A clear agreement gives both sides a shared basis for the final settlement.
Choose between individual sales, bulk lots, and recycling
Choose the route that fits your lot quality, available time, and likely buyer demand. Individual sales can suit well-documented parts with identifiable buyers. Bulk sales can simplify removal when speed and fewer transactions matter more.
A specialist equipment buyer may understand particular feeder families and machine generations. Ask which items it wants and how it evaluates condition. Don’t assume every dealer buys every brand or accepts mixed repair stock.
A broader industrial surplus buyer may review feeders alongside other approved equipment. Our surplus electronics service explains JHI’s work with manufacturing surplus. Send your exact list to confirm whether your specific lot fits our current buying needs.
Auctions and consignment arrangements can offer another route. Compare commissions, storage charges, removal deadlines, and unsold-item terms before committing. A suggested auction value isn’t a guaranteed final selling price.
Use recycling for items with no practical reuse or repair outlet. Confirm acceptance and charges before delivery. Keep the recycling decision separate from whether other items deserve individual resale review.
For broader planning, see our guide on how to sell surplus items. Apply its sales planning steps to your documented SMT inventory. Don’t put all your eggs in one basket when comparing possible routes.
Request a free evaluation of your surplus industrial electronic material. Call JHI at (602) 272-4033 with your inventory and photos ready. Ask us to confirm interest, offer conditions, and pickup options for your specific lot.
Protect machine information and ownership records
Protect confidential information and confirm ownership before transferring equipment or associated records. Feeders and machine controllers need different reviews. Focus the review on the actual item rather than assuming every part stores production data.
A standalone mechanical assembly may have no meaningful user data. A controller, industrial computer, or storage device may need a closer check. Ask your technical team which assets contain programs, customer files, or access credentials.
Separate sale documentation from confidential production records. Buyers may need model details and service evidence without needing your customer designs. Share only the information required to identify and evaluate the equipment.
Before altering a controller, decide which information must be retained internally. Coordinate any clearing process with your technical team and the intended sales condition. Removing software or configuration can affect what remains operational or transferable.
Keep customer-owned assets and licensed items outside the sale until their status is resolved. Ask your responsible internal team to review any transfer restrictions. Don’t promise transferable software rights without checking the relevant agreement.
Better safe than sorry. Record who approved the release and what information handling was completed. Keep that record with the final inventory so ownership and technical responsibilities remain clear.
Pack feeders and delicate parts for the actual journey
Pack each item to prevent movement, impact, and damage during the planned transport. Agree on packing responsibilities before comparing final offers. A valuable assembly can lose its resale usefulness if connectors or mounts arrive damaged.
Keep feeders from striking each other inside shared containers. Protect projecting parts without placing pressure on them. Use suitable supports, dividers, and cushioning based on the manufacturer’s handling guidance.
Give exposed electronic assemblies appropriate protection against static electricity. Ask qualified staff to select suitable packaging for the actual components. Ordinary loose packing material isn’t automatically appropriate for every board or sensor.
Keep small parts with their identified assembly in labeled containers. Record the contents of each box and match them to the inventory. Photograph packed items before closing containers and again after securing the shipment.
For pallet loads, confirm the pallet condition and the proposed load arrangement. Avoid stacking heavy equipment on delicate assemblies. Measure the finished shipment rather than estimating dimensions from the unpacked equipment.
An ounce of prevention is worth a pound of cure. Ask the carrier about its handling requirements before collection. If special crating or loading is needed, identify who arranges it and who pays.
Plan Phoenix pickup around access and working conditions
Plan pickup using the actual site address, loading access, shipment size, and available equipment. A Phoenix location alone doesn’t establish collection cost or eligibility. Confirm those details with the buyer before moving stock into the loading area.
Tell the buyer whether your site has a dock or ground-level access. Explain forklift availability, appointment windows, security check-in, and vehicle restrictions. Mention stairs, narrow doors, or other obstacles before a truck arrives.
For facilities in Tempe, Chandler, Mesa, or Glendale, provide the exact pickup address. Don’t assume an advertised service area means every shipment qualifies for free transport. Get the agreed scope and charges in writing.
Keep equipment protected while it waits for loading. Follow its storage requirements and avoid unnecessary outdoor exposure. In Phoenix, coordinate staging around heat, dust, and the actual collection time.
Prepare a contact list with the seller, buyer, and carrier representatives. Make sure someone can authorize release and resolve quantity questions onsite. Share the final packing list before the scheduled visit.
Many hands make light work when everyone knows their role. Assign counting, loading, paperwork, and access responsibilities beforehand. A coordinated handoff protects your schedule and keeps the equipment traceable.
Check the buyer and agree on a documented handoff
Check the buyer’s identity, purchasing terms, and handling plan before releasing your equipment. A clear business address and named contact provide a starting point. The written agreement should describe the actual lot and transaction.
Ask questions that relate directly to your sale:
- Which listed items are included in the offer?
- Which items require inspection before pricing becomes final?
- Who pays for packing, freight, and rejected equipment?
- When is payment due, and how is it documented?
- What happens if received quantities differ from the list?
- What records will confirm receipt and any recycling service?
Ask for relevant evidence behind certifications or handling claims. Check the scope and site covered when a certification matters to your requirements. Avoid treating a badge as proof of every service or every shipment outcome.
For mixed lots, separate purchased assets from recycling-only material in the agreement. A purchase receipt doesn’t automatically document destruction or recycling. Request the specific records your organization needs before collection.
Trust, but verify. Keep the approved inventory, photographs, correspondence, and final settlement together. That small record set makes later questions easier to answer without reconstructing the whole transaction.
Avoid mistakes that reduce value or delay payment
Avoid vague descriptions, mixed condition claims, and last-minute changes to the agreed lot. These problems make buyers reassess risk. They can also delay collection while both sides check what the offer actually covers.
Don’t strip assemblies before asking whether complete units have a buyer. Removing boards, cables, or brackets may reduce reuse options. Preserve the existing configuration until someone qualified reviews the best disposition route.
Don’t present sample testing as proof that every unit passed. State how many units were tested and which ones. Keep untested units clearly identified even when they look identical.
Don’t hide defects under fresh paint or cosmetic cleanup. Record known repairs and replacement parts accurately. A buyer should understand the condition it is accepting without discovering surprises after delivery.
What good is a higher offer if deductions erase the difference? Check the final terms before celebrating the quoted amount. Clear expectations usually matter more than optimistic assumptions about what inspection will show.
Haste makes waste. Before collection, compare the physical lot with the latest approved inventory. Remove reserved items, flag changes, and confirm that both parties accept the final scope.
Close the sale and prevent the next surplus buildup
Close the sale by reconciling released quantities, received payment, and any remaining items. Update your internal asset records after the transaction is complete. Keep a named owner responsible until every agreed follow-up has been resolved.
Record differences between the initial list and the final shipment. Note withdrawn items, quantity corrections, and equipment retained for operations. This prevents another team from searching for assets that were intentionally removed.
Check the reserved stock as well as the sold stock. Make sure critical spares remain labeled and accessible to maintenance. Return borrowed carts or handling equipment to their assigned locations once loading is complete.
Ask the person receiving payment to confirm the transaction against the agreed terms. Resolve any difference while the inventory and inspection records are easy to find. Mark remaining unsold items for another decision instead of abandoning them in storage.
Keep the settlement records with the inventory version used for the sale. Include packing records, receipt confirmations, and any agreed processing reports. Follow your organization’s record-retention practices rather than scattering files across personal inboxes.
Then review why the stock accumulated. Our excess inventory management strategies cover broader planning and stock controls. Apply those ideas to feeder purchases, spare reservations, and line retirement reviews.
Set a regular review date for slow-moving spares. Ask maintenance to justify reserved quantities against the machines still operating. Revisit those decisions whenever a line leaves service or a major customer program ends.
A stitch in time saves nine. Early review gives you more selling options before removal becomes urgent. It also lets your production team take pride in an orderly, documented transition.
Frequently asked questions about selling surplus SMT equipment
Most selling questions come down to identity, condition, demand, and agreed costs. There isn’t one answer for every feeder lot. The proof is in the pudding, so base decisions on records and written offers.
Can I sell untested SMT feeders?
Yes, some buyers consider untested feeders for evaluation, repair, or parts recovery. Acceptance depends on the exact item and buyer. Describe the units as untested and disclose known faults without promising working performance.
Are old feeders always worth more than scrap?
No, age and appearance don’t establish a resale market. Some identifiable parts remain useful to operators of older equipment. Others have too little demand or too much damage to justify further handling.
Do matching tape widths mean feeders are interchangeable?
No, tape width alone doesn’t establish machine compatibility. Check the complete part number, revision, interface, and manufacturer documentation. Have the intended buyer confirm fit for its specific machine and operating requirements.
Should I sell the feeder cart with the feeders?
Offer the cart as a separately identified option when its ownership and condition are clear. Some buyers may value a compatible storage or setup arrangement. Others may want only the feeders, making a separate price useful.
How long does selling a surplus lot take?
Timing depends on buyer demand, inventory quality, inspection needs, and collection arrangements. Ask each buyer for its proposed schedule. Don’t treat an initial expression of interest as a confirmed purchase or pickup booking.
Does JHI buy every brand of SMT feeder?
JHI’s published services cover industrial electronic surplus, but don’t confirm every specific feeder model. Send the exact part numbers, quantities, condition notes, and photos. Ask us to confirm current interest before arranging shipment.
Is pickup free for a Phoenix feeder lot?
Confirm pickup eligibility and costs for the actual lot before accepting an offer. Access, packing, handling, and shipment size can affect arrangements. A general pickup statement doesn’t replace written terms for your particular transaction.
Should I clean or repair equipment before requesting a quote?
Start with accurate photos and a truthful condition description. Ask whether cleaning, testing, or repair would affect the buyer’s offer. Avoid work that risks damage or costs more than the additional proceeds you expect.
Request a free evaluation from JHI in Phoenix
Start your evaluation with a clear inventory, readable photos, and your preferred removal timeline. Jay Hoehl Inc. has worked with industrial electronic surplus since 1980. Our published services include surplus electronics and excess inventory management.
Provide the manufacturer, complete part numbers, quantities, and known condition for your SMT equipment. Include accessories, test records, and the pickup address when available. We’ll need to confirm whether your specific material fits our current needs.
Request a free evaluation, then discuss pickup for your approved lot. Call (602) 272-4033 and have your inventory ready. Confirm acceptance, pricing conditions, and transport arrangements before releasing equipment.
Our address is 3334 W McDowell Rd, Unit 17, Phoenix, AZ 85009-2414. Published hours are Monday through Friday, 8:00 a.m. to 4:30 p.m. Visits are by appointment only, so call before bringing equipment.
One step at a time gets the job done. Identify the equipment, confirm the offer, and document the handoff. You can clear valuable space while giving usable manufacturing parts a considered next destination.