
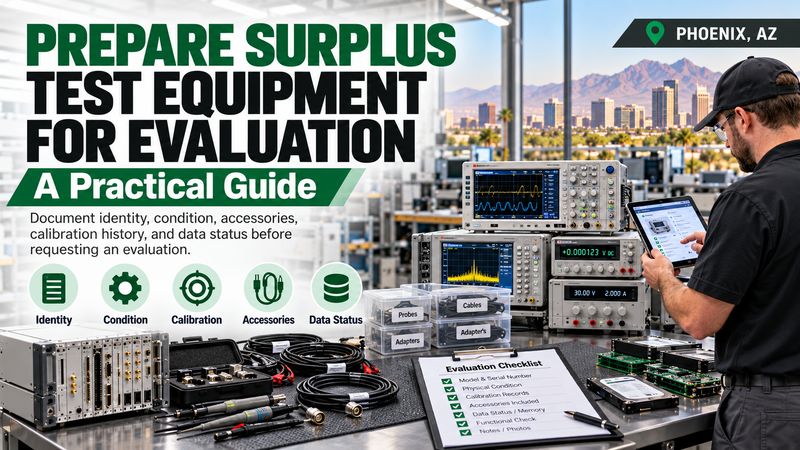
Prepare surplus test equipment by documenting its identity, condition,
accessories, calibration history, and data status. Then share clear
photos and collection details before requesting an evaluation.
That unused oscilloscope might still belong on someone’s workbench.
A missing model number can stall the conversation before it starts.
A clear equipment record gives buyers something useful to review.
Whether you manage a Phoenix lab or a small repair shop, preparation
follows similar steps. Start with facts you can verify. Keep uncertain
details clearly marked. You don’t need perfect equipment, but you do
need an honest description.
Identify Each Instrument
Record the manufacturer, full model, serial number, and installed options.
Show Its Actual Condition
Separate appearance, startup behavior, functional checks, and calibration records.
Plan a Clear Handoff
Confirm data handling, included accessories, pickup access, and written terms.
What Does a Surplus Test Equipment Evaluation Include?
An evaluation reviews an instrument’s identity, condition, completeness,
and potential recovery options. Those options may include resale,
repair, parts recovery, or recycling. The evaluator also considers
demand and the costs involved.
An evaluation isn’t automatically a purchase offer or a technical
certification. A photo review may support an initial estimate.
Final terms may depend on inspection, testing, or inventory confirmation.
Ask which stage your evaluator is providing.
Understand Which Instruments Belong in Your Inventory
Surplus instruments include equipment your organization no longer needs.
Examples include oscilloscopes, multimeters, spectrum analyzers, and
programmable power supplies. Function generators, electronic loads,
and data acquisition systems also deserve individual records.
The broad category is called
electronic test equipment.
These instruments help users generate signals, measure behavior,
or diagnose electrical problems. Their resale potential depends
on much more than their appearance.
Separate an Evaluation From a Guaranteed Sale
A complete inventory improves the review process, but it doesn’t
guarantee an offer. Some instruments have limited demand or expensive
repair needs. Others require accessories that cost more than expected.
Keep your expectations tied to the documented equipment.
Start with the paper trail:
A useful evaluation connects each physical instrument with its records.
Think of the inventory as the equipment’s passport.
It helps everyone confirm what is actually changing hands.
Confirm Ownership Before Preparing Equipment for Sale
Confirm your organization can release each item before offering it
for evaluation. Equipment sitting unused may still belong to another
department, lender, or customer. A quick ownership check can prevent
a difficult handoff later.
Check Asset Records and Internal Approval
Match the instrument’s serial number with your asset register.
Look for purchase records, lease documents, and department assignments.
Identify the person authorized to approve its release.
Keep that approval with your disposition records.
Loaned instruments and rented equipment need special attention.
Customer-owned fixtures may also sit beside company-owned instruments.
Separate these items before taking evaluation photos.
A shared storage shelf doesn’t establish shared ownership.
Identify Restrictions Before Sharing Details
Ask your organization about restrictions affecting transfer, disclosure,
or equipment release. This matters for sensitive research, customer
projects, and controlled environments. Use the appropriate internal
review process when restrictions apply. Don’t assume every instrument
can enter general resale.
Keep confidential labels out of public listings.
Share necessary serial numbers through a suitable business channel.
Your evaluator needs accurate identification, but public exposure
may be unnecessary. Measure twice, cut once applies here.
Create a Clear Surplus Equipment Inventory
Create one inventory row for each instrument before requesting an
evaluation. A shared spreadsheet usually works well. Keep descriptions
consistent so the evaluator can compare items quickly. Avoid combining
unrelated instruments under a single vague label.
“Assorted lab equipment” leaves too many questions unanswered.
Specific records help connect photos, accessories, and documents.
For a broader tracking process, use our
guide to IT asset inventory.
Apply the same identification discipline to bench instruments.
| Inventory Field | What to Record | Why It Helps |
|---|---|---|
| Manufacturer and model | Brand, complete model number, and model suffix | Identifies the instrument and its configuration |
| Serial number | The instrument’s unique serial number | Connects photos, certificates, and ownership records |
| Installed options | Documented hardware and software options | Shows capabilities beyond the base model |
| Observed condition | Physical condition, startup behavior, and known faults | Sets clear inspection expectations |
| Calibration records | Certificate date, provider, results, and serial match | Supports review of measurement history |
| Included accessories | Probes, adapters, modules, fixtures, and cables | Defines the equipment package |
| Location and access | Storage location, floor, loading access, and restrictions | Helps plan inspection and collection |
Use Consistent Item Labels
Give each item a simple inventory reference.
Use that reference in photo names and document folders.
Keep the manufacturer’s serial number as a separate field.
This prevents confusion when several instruments share the same model.
Label accessory bags with the matching reference.
Keep loose modules associated with their original chassis.
If compatibility is uncertain, record that uncertainty.
A tidy list should never hide a missing fact.
Identify Exact Models, Options, and System Components
Record the complete configuration because similar instruments can have
different capabilities. Model suffixes, installed modules, and licensed
features may affect usefulness. Photograph the identification label
and any accessible configuration screen. Keep both records together.
Document Installed Hardware and Software Options
Capture options shown by the instrument’s approved information menu.
Examples include memory upgrades, measurement applications, and
additional channels. Record firmware versions when available.
Avoid changing settings simply to produce a more impressive description.
A feature appearing on a screen doesn’t prove its license transfers.
Software rights may depend on the manufacturer’s terms.
Record the observed feature and any supporting paperwork.
Ask the evaluator how transferability will be checked.
Keep Modular Systems Together
Inventory modular equipment at both chassis and module levels.
Include controllers, interface cards, and installed measurement modules.
Photograph the populated system before removing anything.
Follow the manufacturer’s instructions if removal is necessary.
A missing controller can change how a complete system is evaluated.
A loose module may also require a compatible chassis.
Think of the system like a toolbox.
Knowing which tools belong inside matters.
Describe Equipment Condition Without Overstating It
Describe exactly what you observed instead of calling every instrument
“working.” Appearance, startup behavior, measurement performance,
and calibration are different facts. Keeping those facts separate
builds trust. It also reduces disagreements after inspection.
Choose a Condition Description You Can Support
| Description | What It Communicates | What It Does Not Establish |
|---|---|---|
| Untested | No current functional checks were completed | Whether the instrument operates correctly |
| Powers on | The instrument started during an observed check | Measurement accuracy or complete functionality |
| Self-test completed | The built-in test completed with documented results | Performance across every specification |
| Selected functions checked | Named functions were checked under recorded conditions | Untested functions or full calibration status |
| Known fault | A specific problem was observed or documented | The complete repair scope or repair cost |
Write Specific Fault Notes
Replace vague notes with clear observations.
“Display flickers after startup” gives more information than “screen issue.”
“Channel two was not checked” is better than guessing.
Buyers can work with uncertainty when you identify it honestly.
Include when the observation occurred and who performed the check.
Mention whether the instrument was previously used in production.
Historical use provides context, but it doesn’t confirm current condition.
Call a spade a spade.
Perform Only Safe, Appropriate Basic Checks
Perform basic checks only when trained personnel can follow the model’s
operating instructions. An evaluation package doesn’t require risky
troubleshooting. Leave questionable equipment unpowered.
Describe why testing was skipped.
Inspect Before Applying Power
Look for damaged cords, broken connectors, missing covers, and signs
of contamination. Check for unusual odors, liquid damage, or swollen
batteries. Review the instrument’s power requirements before connecting
it. Stop if its condition raises concerns.
Don’t open an enclosure to investigate unknown faults.
Internal components may present hazards even after power is disconnected.
Qualified service personnel should handle internal inspection.
Saving a few minutes isn’t worth an unsafe shortcut.
Record the Check Instead of Expanding It
If startup is appropriate, record what actually happens.
Photograph the screen and any displayed error.
Note the test date and operating conditions.
Use built-in checks only as the manufacturer directs.
Don’t improvise high-voltage, high-current, or radio-frequency tests
for a sales video. Avoid connecting unknown loads or unsupported
accessories. A short, documented check is more useful than an
unexplained demonstration. When in doubt, leave the item untested.
A powered display proves a limited fact:
It shows that the instrument started during that observation.
It doesn’t prove accurate measurements, safe operation, or
complete functionality.
Gather Calibration and Service Records
Gather existing calibration certificates, service reports, and
maintenance notes before requesting evaluation. These records explain
the instrument’s history. They also help distinguish documented
performance from assumptions. Match every document to the correct
serial number.
Check What the Certificate Actually Covers
Review the calibration date, instrument identity, results, and listed
limitations. Look for supporting measurement data when available.
A sticker alone provides less context than a complete certificate.
Missing paperwork should be marked as unavailable.
Calibration history doesn’t guarantee the instrument still meets
every specification. Damage, storage conditions, and later use may
affect performance. Keep the certificate and current condition
description separate. Let the evaluator review both.
Ask Before Paying for New Calibration
Don’t automatically purchase calibration before getting an initial opinion.
Its cost may exceed the expected benefit.
Buyer requirements also vary.
Ask whether updated calibration would meaningfully change the likely offer.
Include repair invoices and unresolved service recommendations.
A documented replacement board may answer useful questions.
An unresolved fault deserves equal visibility.
There’s no point dressing up an incomplete history.
Match Accessories With the Correct Instruments
Group accessories with their matching instruments before taking your
final inventory photos. Complete packages are easier to understand
and inspect. Missing parts can affect usability. Loose accessories
can also have separate evaluation potential.
Check Probes, Cables, and Specialized Fixtures
Identify probes by their own model numbers.
Include their tips, adapters, and power modules when present.
Photograph damaged cables or missing pieces.
Don’t describe an accessory as compatible unless you can support that claim.
For multimeters, list leads and other included accessories.
For analyzers, document adapters and reference components.
For power supplies, identify terminal hardware and supported connection
accessories. Keep descriptions specific to the actual equipment.
Separate Shared Accessories From Included Accessories
Some accessories serve several instruments in a laboratory.
Decide which items are included before requesting offers.
Mark shared items clearly.
Avoid promising the same probe or fixture with multiple instruments.
Keep manuals, transport cases, and original packaging when available.
Record missing power supplies or proprietary cables.
Small parts can become a big sticking point.
Clear packaging details help prevent that surprise.
Take Photos That Support an Accurate Evaluation
Take clear photos that connect each instrument’s identity with its
actual condition. Use even lighting and an uncluttered background.
Keep the entire instrument visible in overview shots.
Add close-ups for important details.
Build a Useful Photo Set
- Front view:
Show the display, controls, connectors, and overall appearance. - Rear view:
Show interfaces, installed modules, and power connections. - Identification label:
Capture the full model and readable serial number. - Configuration screen:
Record installed options when safely accessible. - Accessory group:
Show everything included with that inventory item. - Damage details:
Document cracks, bent connectors, corrosion, or missing controls.
Use Video for Specific Observations
A short video can document startup behavior or a displayed fault.
Show the instrument’s identity before the demonstration.
State what was checked and what wasn’t.
Keep confidential information out of the frame.
Avoid filters that hide scratches or discoloration.
Don’t use another unit’s screen photo to represent this instrument.
A picture may be worth a thousand words.
It still needs to show the right equipment.
Name files with the inventory reference and view.
Keep original images available for closer inspection.
Send enough detail to answer questions without overwhelming the reviewer.
A consistent folder structure makes that easier.
Protect Stored Data Before Releasing Test Equipment
Review stored data before allowing an instrument to leave your
organization. Some instruments retain waveforms, screenshots, setup
files, or network details. Others include removable media or internal
drives. Their data handling needs vary by model.
Identify Where Information May Be Stored
Ask the equipment owner about saved projects and connected storage.
Review removable drives, memory cards, and embedded computer systems.
Consider credentials, customer identifiers, and proprietary test
configurations. Keep authorized records before any approved deletion.
What good is a clean bench if confidential files leave with the equipment?
Physical cleanup and data handling belong in the same preparation plan.
Assign responsibility before scheduling collection.
Don’t leave the decision until loading day.
Follow the Manufacturer’s Model-Specific Procedure
Use the manufacturer’s security documentation for the exact instrument.
A generic factory reset may not address every storage location.
Some procedures can affect settings or require additional service.
Have authorized personnel review the instructions first.
Record the method, date, operator, and equipment identity.
Verify the outcome using the appropriate procedure.
If handling remains unresolved, hold the instrument.
Describe any missing storage hardware in the evaluation inventory.
Keep security and resale details connected:
Removing storage may affect operation or completeness.
Document that change so the evaluator understands the resulting
configuration.
Clean and Store Instruments Without Causing Damage
Clean external surfaces only as the manufacturer allows.
Preparation should improve visibility without changing the instrument’s
condition. Don’t attempt cosmetic repairs that hide defects.
Preserve labels, calibration stickers, and identification plates.
Use Gentle, Approved Cleaning Methods
Disconnect equipment before approved external cleaning.
Avoid spraying liquids directly into vents, controls, or connectors.
Don’t use strong solvents unless the manufacturer specifically permits them.
Leave internal cleaning to qualified personnel.
Photograph existing damage before cleaning.
Record sticky controls, stained enclosures, and damaged feet.
A cleaner appearance doesn’t establish better measurement performance.
Keep those descriptions separate in your inventory.
Plan Storage Around Phoenix Conditions
Store instruments within their published environmental limits.
Phoenix storage areas can expose equipment to heat and dust.
Avoid leaving prepared instruments in vehicles or uncovered loading areas.
Check requirements for batteries and sensitive accessories.
Protect connectors from impact and contamination.
Keep equipment away from leaks and unstable stacks.
Leave enough space to retrieve items safely.
An ounce of prevention helps protect the work you’ve already done.
Separate Reusable Instruments From Special Handling Items
Separate ordinary surplus instruments from equipment needing additional
safety or contamination review. A general electronics evaluation may
not cover every laboratory device. Tell the evaluator about unusual
components or prior use. Confirm acceptance before arranging transport.
Flag Equipment With Unresolved Safety Concerns
Identify damaged batteries, unknown residues, and equipment with missing
protective covers. Report chemical, biological, or other contamination
concerns through your organization’s process. Don’t assume an instrument
is safe because it looks clean. Let qualified personnel determine
the next steps.
Keep supporting clearance records when your workplace requires them.
Describe any components removed during preparation.
For mixed laboratory clearouts, our
laboratory equipment recycling and disposition overview
provides related context. Confirm the actual handling scope for your equipment.
Sort Without Making Unsupported Value Claims
Separate apparently complete units, incomplete units, and known repair
candidates. Keep untested items clearly labeled.
Don’t move everything into a scrap pile before review.
Some accessories or modules may deserve individual consideration.
Sorting is a practical first step, not a final valuation.
Let the evaluator confirm the likely recovery route.
Keep each category accessible for inspection.
That avoids digging through the same equipment twice.
Understand What Affects Surplus Test Equipment Value
Value depends on demand, configuration, documented condition, and the
costs required for recovery. Original purchase price offers historical
context. It doesn’t establish today’s resale value.
Two similar-looking instruments may receive different evaluations.
Review the Factors Buyers Can Actually Assess
- Exact model:
Specifications and model variants affect buyer suitability. - Installed options:
Verified capabilities may change the instrument’s usefulness. - Condition evidence:
Clear observations reduce uncertainty during review. - Completeness:
Missing probes or modules may limit practical use. - Support availability:
Repair options and parts access may affect recovery costs. - Market demand:
Buyer needs differ across equipment categories. - Collection requirements:
Packing, removal, and transport affect the overall transaction.
Distinguish Listing Prices From Completed Transactions
An advertised price shows what a seller requested.
It doesn’t prove what a buyer paid.
Warranty coverage and dealer testing can also affect retail pricing.
A direct purchase offer may reflect different responsibilities.
Ask how the evaluator accounts for repairs, testing, and transport.
Compare the complete terms rather than one headline number.
A higher estimate may come with additional deductions.
The devil is in the details.
There’s no reliable universal payout for surplus instruments.
Model details and condition evidence are essential.
Share your inventory before expecting a meaningful estimate.
Avoid treating an online asking price as a guaranteed result.
Send an Evaluation Package That Answers the Main Questions
Send the inventory, photos, condition notes, and collection details
together. This gives the evaluator a clear starting point.
Keep your first message focused on verified facts.
Offer supporting records in an organized folder.
Include Your Timeline and Preferred Outcome
State whether you want a purchase review, recycling discussion, or
mixed disposition plan. Include your preferred completion date and
any firm building deadlines. Explain whether individual items can
be considered separately. Mention if another department controls
release approval.
Phoenix businesses planning an equipment clearout can start with our
surplus test equipment service page.
Share the actual inventory before discussing collection.
Confirm current acceptance, evaluation steps, and any applicable charges.
Ask How the Initial Estimate Becomes Final
Ask whether the response is preliminary or binding.
Confirm what inspection may change.
Request written clarification about excluded items and deductions.
Keep the inventory version associated with the response.
Why guess which details matter when you can send the whole picture?
One organized package can reduce repeated questions.
It also gives your team a common reference.
That makes the next conversation more productive.
Plan Packing and Pickup Before Moving Equipment
Confirm packing responsibilities and loading arrangements before anyone
moves the instruments. Equipment can suffer damage between the bench
and the vehicle. A clear handoff plan protects both the equipment
and its records. Don’t leave removal details to chance.
Choose Packaging Appropriate for the Instrument
Use original protective packaging when available and suitable.
Otherwise, follow the manufacturer’s instructions for the model.
Protect displays, knobs, handles, and exposed connectors.
Pack loose accessories so they cannot strike the instrument.
Tektronix provides
instrument packing guidelines
for its equipment. Its guidance emphasizes suitable cartons and
protective cushioning. Use model-specific instructions when they
provide additional requirements. Don’t assume one packing method
suits every instrument.
Describe Access and Loading Conditions
Share equipment dimensions and verified weights when available.
Explain stairs, elevators, door restrictions, and loading dock access.
Identify whether instruments remain installed in racks.
Confirm who handles disconnection, lifting, and packing.
For Phoenix-area facilities, coordinate visitor access and receiving
rules in advance. Give the collection team an onsite contact.
Keep equipment protected while waiting.
A little planning keeps collection day from becoming a scramble.
Keep Identity Records Visible During Handoff
Match packed items with the final inventory.
Mark containers with their equipment references.
Keep sensitive details out of unnecessary public view.
Photograph the prepared equipment before collection.
If equipment moves between departments before pickup, document that transfer.
Keep accessories with the correct unit throughout.
Update the inventory when anything changes.
The final package should match what the evaluator expects.
Agree on Written Terms and Handoff Records
Confirm the transaction scope before releasing equipment.
Written terms should identify the equipment, responsibilities, and
payment arrangements. They should also explain any remaining
inspection conditions. Keep a copy with your internal approval records.
Clarify Costs and Responsibilities
Ask whether packing, removal, testing, or transport creates separate charges.
Confirm who supplies labor and handling equipment.
Discuss what happens if inspection finds undisclosed problems.
Avoid relying on assumptions about free pickup or guaranteed payment.
If your project combines resale and recycling, separate those outcomes
clearly. Some items may have recovery value.
Others may require a different handling arrangement.
Request terms that make those differences easy to understand.
Request Records That Match Your Needs
Ask which pickup receipts, inventory acknowledgments, or disposition
records are available. If data handling is included, define its scope
separately. Confirm the timing and format of any supporting
documentation. Don’t assume every transaction includes identical records.
Keep the agreed inventory, signed handoff record, and final financial
documents together. Resolve discrepancies while the details remain
fresh. Good records close the loop.
They also help your team answer later asset questions.
Avoid Common Equipment Preparation Mistakes
Most preparation mistakes involve missing information or unsupported
claims. You can avoid many problems without buying new equipment
or extensive testing. Focus on identification, honesty, and
organization. Don’t let presentation outrun the facts.
Don’t Mix Different Condition Levels
Keep tested instruments separate from units with unknown condition.
Label repair candidates clearly.
Don’t describe a mixed lot using its best item.
The weakest records can create uncertainty about the whole package.
Don’t Remove Useful Parts Without Documentation
Pulling modules, storage, or accessories can change an instrument’s usability.
Follow approved procedures before removing anything.
Record what was removed and why.
Update photos so they match the offered configuration.
Don’t Spend Money Before Understanding the Benefit
Repairs, replacement accessories, and calibration may not return their cost.
Ask for an initial review first.
Discuss the likely difference between current and improved condition.
Don’t chase a speculative price with confirmed expenses.
Don’t Assume Old Equipment Has No Use
Age alone doesn’t determine the right disposition route.
Some buyers need older instruments for established systems.
Other models may have little practical demand.
Let the documented configuration guide the discussion.
Our
Phoenix surplus electronic test equipment guide
offers additional local buying context.
Use it alongside your instrument records.
Keep your evaluation focused on the actual equipment being offered.
Final Surplus Test Equipment Preparation Checklist
Complete this checklist before sending your evaluation request.
Mark unavailable information honestly instead of leaving unexplained gaps.
Assign one person to review the final package.
A second look can catch mismatched serial numbers or missing accessories.
Your Evaluation Package Is Ready When You Have:
- Confirmed ownership and approval to release the equipment.
- Recorded complete model numbers and individual serial numbers.
- Listed installed modules, options, and known license limitations.
- Separated untested items from items with documented checks.
- Described faults, physical damage, and missing components.
- Matched available calibration and service records with each instrument.
- Grouped included probes, cables, fixtures, and accessories.
- Taken clear identification, condition, and accessory photos.
- Completed the appropriate review of stored information.
- Flagged contamination concerns and special handling needs.
- Shared your timeline, location, and collection restrictions.
- Asked how estimates, charges, and final acceptance work.
If information is missing, explain the gap in your first message.
An evaluator may still review an incomplete record.
The important part is avoiding hidden assumptions.
Honest preparation gives everyone a firmer starting point.
Frequently Asked Questions
Select a question below to open or close its answer.
What should I send first for a test equipment evaluation?
Send the manufacturer, complete model number, serial number,
and observed condition. Include clear photos and a list of
accessories. Add calibration records when available.
Mention your location, timeline, and any collection restrictions.
State whether the equipment was tested or remains untested.
This gives the evaluator useful context immediately.
You can provide more detailed records after the initial review.
Can untested or broken instruments still be evaluated?
Some evaluators consider untested or nonworking instruments.
Acceptance depends on the model, condition, completeness, and
available recovery options. Describe the problem without guessing
its cause. Confirm acceptance before transporting the equipment.
Don’t attempt unsafe testing simply to avoid an untested label.
Clear photos and accurate identification can still support
an initial discussion.
Do I need new calibration before selling surplus equipment?
New calibration isn’t automatically necessary before requesting
an evaluation. Share existing records first.
Ask whether updated calibration would change the likely terms.
Its cost may outweigh the expected benefit.
A buyer may have specific calibration requirements.
Those requirements should be discussed before you authorize
additional work.
Does passing a self-test mean an instrument is fully functional?
Passing a self-test doesn’t establish complete performance across
every specification. It documents the result of that built-in
check. Record the result accurately.
Keep it separate from calibration status and any external
functional checks.
Describe exactly which checks were completed.
Avoid broader claims that the available evidence cannot support.
Can test equipment contain confidential information?
Some instruments store files, settings, screenshots, credentials,
or measurement data. The storage locations depend on the model.
Review the manufacturer’s security documentation before release.
Have authorized personnel complete the appropriate data handling process.
Don’t assume a basic reset clears every storage location.
Record the approved procedure and its verified outcome.
Should I sell the equipment individually or as a complete lot?
Individual evaluation may make sense for distinctive or potentially
valuable instruments. A complete lot may simplify removal.
The better approach depends on your timeline and inventory.
Ask how each option affects responsibilities and expected recovery.
Keep individual records even when offering a complete lot.
That makes the scope easier to confirm.
Will every instrument have resale value?
No instrument has guaranteed resale value.
Demand, faults, missing accessories, and recovery costs all matter.
Some items may suit parts recovery or recycling.
An evaluation should explain which route appears appropriate.
Avoid assuming an expensive original purchase guarantees a strong
current offer. Use the actual model and condition as your
starting point.
How should Phoenix businesses arrange equipment collection?
Share the inventory before requesting a collection date.
Confirm acceptance, charges, packing duties, and loading access.
Explain stairs, elevators, security procedures, and equipment
still installed in racks. Get the agreed arrangements in writing.
Protect instruments from heat, dust, and handling damage while
awaiting pickup. Follow each model’s storage and transport requirements.
Can software options increase an instrument’s value?
Documented options may affect usefulness and buyer interest.
However, a visible feature doesn’t automatically establish
transferable license rights. Record the option and its supporting
documents. Ask how transferability will be verified.
Don’t advertise permanent access unless the applicable terms
support that claim.
What records should I keep after the equipment leaves?
Keep the final inventory, release approval, written terms, and
handoff acknowledgment. Retain financial and disposition records
provided for the transaction. Include data handling records when
applicable. Make sure equipment identities match across those documents.
Ask about available documentation before scheduling the handoff.
That helps avoid missing records later.
Prepare Your Phoenix Equipment for a Clearer Next Step
Good preparation makes surplus test equipment easier to identify,
review, and transfer. Start with the inventory.
Add condition evidence and supporting records.
Resolve data handling and collection responsibilities before release.
You don’t need to make every instrument look perfect.
You need to show what is present and what remains unknown.
That approach supports a more useful evaluation.
It also helps your team avoid last-minute surprises.
Jay Hoehl Inc.
works with industrial surplus and electronics in Phoenix.
Share your equipment details to discuss the appropriate next steps.
Confirm current requirements and written terms before committing
to collection.