
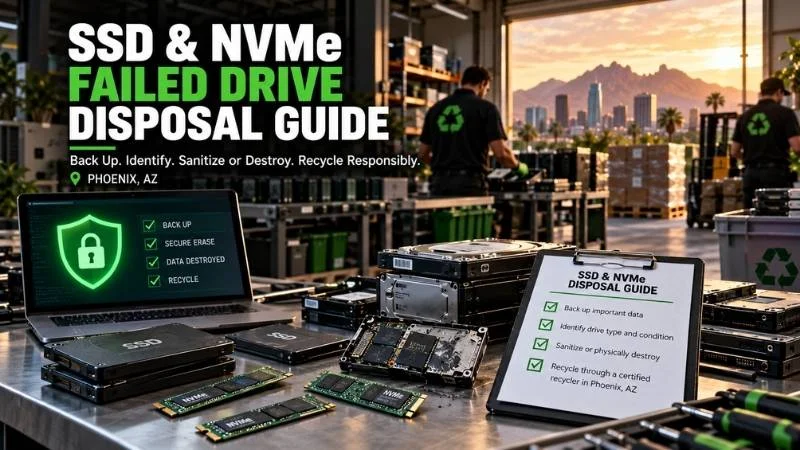
SSD, NVMe, and Failed
Drive Disposal Guide
Quick answer: Back up anything you need, identify
every data-bearing drive, and choose a verified sanitization or
destruction method before recycling. An SSD or NVMe drive may hold data
even when a computer will not start. If a drive cannot complete a
supported erase, keep it under control and arrange appropriate physical
destruction. Recycle the remaining hardware through an electronics
recycler, never a household bin.
A drawer of old drives looks harmless. Yet a tiny M.2 stick can carry
years of payroll files, family photos, or customer records. This guide
helps Phoenix households and businesses decide what to erase, what to
destroy, and what to document before anything leaves their hands.
The short version is simple. A working drive gives you more options.
A failed drive needs a more cautious plan. And a drive that has already
left your custody without an agreed process creates a problem you cannot
fix afterward.
Start with
the outcome: reuse, destruction, or recovery
Decide what must happen to the data before deciding where the device
goes. A working laptop intended for reuse needs a verified sanitization
method that fits its storage. A failed SSD holding confidential files
may need physical destruction instead. A damaged drive containing
irreplaceable photos might need professional recovery first.
Do not mix those goals. Destruction ends the recovery option. Reuse
requires confidence that old data is inaccessible. Recycling addresses
the hardware after the data decision, not in place of it.
Ask three questions before you unplug anything:
- Do you need the files? Check backups, shared
drives, cloud accounts, and any legal hold. - Will the storage device be reused? Choose a
supported method and verify completion. - How sensitive was the data? Match the method and
documentation to the risk.
For a business, name one person who can approve the decision. The
person boxing the equipment may not know whether a drive holds medical
records, design files, or a shared accounting folder. A quick inventory
prevents the wrong device from taking the wrong path.
A practical decision table
| Drive condition and goal | Sensible next step | Important limit |
|---|---|---|
| Working SSD or NVMe, reuse planned | Use a supported device sanitize or validated cryptographic erase procedure. Verify and record the result. |
Ordinary file deletion is insufficient. |
| Working SSD or NVMe, no reuse planned | Choose verified sanitization or suitable physical destruction based on data sensitivity. |
Confirm the provider’s method fits solid-state media. |
| Failed or unreadable SSD/NVMe | Keep secure; assess recovery need; arrange suitable physical destruction when erasure cannot be verified. |
A failed interface does not prove the chips are blank. |
| Working magnetic HDD | Use an appropriate verified method or physical destruction. | HDD procedures do not automatically transfer to SSDs. |
| Laptop with unknown or soldered storage | Identify storage before handoff; ask how the entire device will be processed. |
Removing the visible drive may leave another one behind. |
This table is a starting point, not a substitute for your
organization’s records policy. A school, clinic, or government
contractor may have a stricter retention rule. Check that rule before
any drive is erased or destroyed.
Know what you are holding
SSD describes storage built around solid-state memory. NVMe describes
a way a computer communicates with certain storage devices. Many NVMe
drives are SSDs, but not every SSD uses NVMe. The terms tell you
different things about the same asset.
A 2.5-inch SATA SSD resembles a small metal box. An M.2 NVMe drive
can look like a narrow circuit board. A U.2 or U.3 drive may sit inside
a server tray. Some thin laptops have storage soldered to the main
board, which makes removal harder.
Why does identification matter? Your erase tool must reach the actual
device and use a method the hardware supports. A checklist labeled “hard
drive wiped” tells you little when the asset was an NVMe SSD. Record the
media type, device model, and serial number whenever possible.
The controller inside a solid-state drive manages where data lands on
flash chips. Features such as wear leveling help the device work, but
they complicate assumptions about ordinary overwrites. The background
explanation of a solid-state
drive helps explain why SSDs deserve their own disposal plan.
Places old data can hide
Look beyond the obvious removable drive. A desktop may contain a
second SSD, a small boot drive, or an old HDD used for backup. A server
may have several removable drives plus a separate boot module. A copier,
network appliance, or industrial controller can also contain
storage.
External enclosures deserve another look. A USB case might hide a
SATA SSD or HDD. A tiny USB flash drive can hold a surprising amount of
personal information. Your inventory should list each storage component,
not only each computer chassis.
If you cannot identify the media safely, leave the device intact. Ask
the recycler or IT team to identify and document its storage. Guessing
from the size of a case is an easy way to miss a second drive.
Why delete,
format, and factory reset can fall short
Deleting files changes how the computer presents them. It does not
necessarily sanitize the underlying media. Emptying the recycle bin,
reinstalling an operating system, or formatting a partition can leave
recoverable information or unaddressed storage areas.
A factory reset can be useful, especially for a device designed
around full-disk encryption. But the label “reset” alone is not proof.
You need to know which storage was covered, whether encryption was
active, and whether the process finished successfully.
The same caution applies to consumer “wipe” software. An overwrite
command aimed at visible logical blocks may not reach every retired
flash block. That does not mean every drive must be shredded. It means
you should select a supported sanitization method and verify its
result.
The current NIST Guidelines for
Media Sanitization frame the choice around information sensitivity,
the media, and the intended disposition. Their terms include Clear,
Purge, and Destroy. A business should document why its selected method
is appropriate, instead of treating one command as a universal
answer.
Important: “NIST compliant” should describe an
actual documented process. Ask which method was used, how success was
checked, and what happens when a drive fails. A slogan on a receipt does
not answer those questions.
For more context on what happens before equipment changes hands, see
JHI Scrap’s guide to the
importance of data destruction. It connects the data decision to the
rest of the electronics disposal process.
Choose the method that
fits the drive
A safe plan has two parts: a method suited to the media and evidence
that it happened. Neither a certificate alone nor a software success
screen alone proves that every device in a pile was covered. Match the
record to the asset.
Clear: appropriate
for some lower-risk cases
Clear uses a logical method to protect against straightforward
recovery through normal device interfaces. It can fit certain
lower-sensitivity reuse scenarios when the method is supported and
verified. Your policy must decide whether that level of assurance is
enough.
Do not confuse “Clear” with simply deleting a folder. The distinction
is about a sanitization procedure applied to the target media. If the
tool cannot identify the drive or report completion, the result is
unknown.
Purge:
stronger protection through a suitable mechanism
Purge aims to make recovery infeasible against a stronger level of
effort. Depending on the hardware and approved procedure, it may use a
dedicated device sanitize command or cryptographic erase. The exact
choice needs compatibility checks and validation.
Cryptographic erase makes previously encrypted data inaccessible by
eliminating the relevant encryption keys. That depends on trustworthy
encryption covering the target data before the erase. If you cannot
establish that condition, do not assume deleting a key solves the
problem.
Some SSD and NVMe devices support vendor or standards-based sanitize
functions. Command names differ between interfaces and devices. An IT
administrator should consult the device documentation and use a tool
that reports a reliable outcome for the actual model.
Destroy:
when reuse is unnecessary or sanitization cannot be verified
Physical destruction renders the storage media unusable through an
approved process. For solid-state drives, the method must address the
data-bearing flash components. Breaking a connector or bending the
casing is not the same thing.
The right destruction approach depends on the device design and your
required assurance. A provider should explain how it handles tiny M.2
boards, larger server drives, and storage soldered to another board. Ask
whether drives are removed, processed intact, or handled under a special
procedure.
Never use degaussing as the solution for an SSD or NVMe
drive. Degaussing applies to magnetic media, while solid-state
memory stores data differently. A hard drive magnet, household drill, or
microwave is also a poor security plan and can introduce safety
hazards.
How to verify the outcome
For a logical method, record the tool, method, device model, serial
number, operator, date, and completion status. Review errors instead of
filing them with successful jobs. Spot-checking may help, but it should
not replace the procedure your policy requires.
For destruction, match the device or container identifiers to the
destruction record. Ask what the provider’s certificate actually lists.
A load-level receipt, a serialized certificate, and a witnessed process
offer different levels of evidence.
Keep records where your team can find them later. A spreadsheet lost
on the laptop being recycled is no use during an audit. Store logs,
pickup paperwork, and any destruction confirmation in your normal
records system.
What changes
when an SSD or NVMe drive has failed?
A failed drive can stop talking to the computer while still retaining
data. The fault may involve the interface, controller, power circuitry,
or firmware rather than every flash chip. Treat “unreadable” as a
condition, not proof of sanitization.
First decide whether data recovery is necessary. Check backups before
anyone runs repair software or opens an enclosure. If the files matter,
talk to an appropriate recovery specialist and preserve the device.
Every attempted fix can change the situation.
If the files are no longer needed, isolate the failed drive. Label it
as data-bearing and record why an erase could not be verified. Move it
through a secure destruction workflow suited to its media. Then recycle
the resulting material responsibly.
A Phoenix office clearing a storage closet may find drives with no
matching computers. Put them into a separate, controlled container. Do
not toss them into a mixed bin of cords and keyboards. A little sorting
now makes custody easier to explain later.
Does a dead
computer mean its drive is dead?
No. A failed power supply or motherboard says little about the
storage. Remove or identify the data-bearing media only if your team can
do so safely. Otherwise, ask for the whole unit to be treated as
containing sensitive data.
What
about a drive that reports errors during sanitization?
Stop and mark the attempt as unsuccessful. An error message, timeout,
or partial completion is not a clean result. Decide whether a second
supported attempt is warranted, or send the drive for suitable
destruction.
For organizations, this exception path matters as much as the normal
path. A process that handles only healthy drives leaves the most awkward
devices unattended. Keep an exception log and close each entry when the
media has a verified outcome.
Before you pack it:
the household checklist
For a household, the goal is to avoid losing cherished files while
protecting personal information. You do not need an enterprise asset
database. You do need a deliberate sequence before drop-off.
- Make a backup. Open a few files from the backup to
confirm they work. Remember browser data, tax records, photos, and
password vault recovery information. - Sign out where appropriate. Remove the device from
accounts or activation systems according to its manufacturer’s
directions. Do this before the device becomes unusable. - Identify the storage. Look for an SSD, HDD,
removable card, or soldered storage. Check external drives in the same
pile. - Choose your data path. Use a supported erase method
if the device works and reuse is planned. Seek a suitable destruction
option when erasure cannot be verified. - Separate unusual items. Tell the recycler about
swollen batteries, damaged devices, or loose lithium batteries before
arrival. - Confirm acceptance and hours. Ask whether the site
accepts the exact item and whether an appointment or fee applies.
Do not put a drive or a laptop in curbside recycling. That stream is
for ordinary household packaging, not an uncontrolled data-bearing
device. Keep the equipment indoors until you can hand it over through
the planned channel.
The U.S. EPA also advises people to remove personal information
before electronics recycling and to handle batteries separately when
needed. A removable lithium-ion battery should follow the applicable
collection instructions. Do not pry out a glued battery just to prepare
a device for recycling.
If you are deciding whether to remove a drive, JHI Scrap covers that
question in should
you remove a hard drive before recycling?. The practical answer
depends on your data plan and the recycler’s process.
For
Phoenix businesses: build a defensible chain of custody
A company needs to know which assets left, who received them, and how
their data was handled. That is especially true during office closures,
server refreshes, and school lab cleanouts. A cardboard box marked “old
computers” is not an inventory.
Start with a list of devices. Record serial numbers when visible,
physical location, owner or department, media type, and whether the
equipment might be resold. Add a field for data classification and
another for the approved outcome. This keeps reuse and destruction
decisions from colliding.
Next, control access. Use a designated holding area and named
handlers. Seal or count containers when practical. At pickup, compare
the manifest with what leaves your site. Keep transfer records with the
final processing documents.
Questions to ask a disposal
partner
- Which SSD and NVMe sanitization methods do you use, and how do you
handle unsupported models? - What happens if a drive is failed, missing a serial number, or
soldered to a board? - Can you separate media chosen for reuse from media chosen for
destruction? - What identifiers appear on your receipt, log, or certificate?
- Who handles the equipment after your pickup, and how is downstream
processing managed? - Which batteries or damaged devices require special packing or
advance notice? - Is the price based on volume, pickup, labor, media processing, or
documentation?
Ask for the answers that matter to your policy in writing. A clinic
handling patient information may need more records than a small shop
recycling an empty monitor. Neither should assume that “free pickup”
includes specialized data work.
This is where a broader IT asset disposition
plan helps. It connects secure handling with reuse, value recovery,
and responsible recycling. The data decision should be built into that
flow from the beginning.
Keep data claims precise
A certificate of recycling does not automatically certify data
destruction. A generic pickup receipt does not prove that an individual
SSD was sanitized. Ask for the exact record that supports the claim you
need to make.
Likewise, a provider’s general mention of a standard does not prove a
specific drive received a specific method. For regulated information,
involve your privacy or compliance lead before selecting the process.
They can set the required evidence and retention period.
A simple sign-off works well. The asset owner confirms that no legal
hold or needed data remains. IT approves the data method. Facilities
coordinates pickup. One named person checks the records afterward. That
division reduces the chance of a lost drive between teams.
Pickup,
drop-off, and pricing in the Phoenix area
Phoenix residents and businesses have different service needs. A
person with one old laptop may seek an appointment-based drop-off. A
business with racks of drives and computers may need pickup, inventory
support, and proof of destruction. Ask about the exact scope before
loading a vehicle.
JHI Scrap lists its Phoenix location as 3334 W McDowell Rd, Unit 17.
Its contact page says public visits are by appointment only. Call (602)
272-4033 before visiting and describe the media, quantity, condition,
and data requirements.
A quote can change with the number of devices, travel, sorting work,
the selected sanitization or destruction method, and the requested
records. Unusual items, especially damaged batteries, can also change
handling. Ask for any fees and acceptance conditions before
scheduling.
Do not assume a “free evaluation” means every service is free. JHI
Scrap invites customers to request an evaluation of surplus industrial
electronic material. Confirm the terms for your specific load and the
proof you need.
A short description speeds the conversation. For example: “We have 24
laptops, six loose NVMe drives, and two failed SSDs. We need an asset
list and separate treatment for drives we cannot erase.” That is easier
to quote than “some old electronics.”
Ready to plan a pickup? Share your media types,
approximate quantity, and data requirements when you request an evaluation. You can
confirm accepted items, scheduling, and documentation before anything
changes hands.
Local logistics that
are easy to overlook
Phoenix heat is hard on unattended electronics. Avoid leaving drives,
laptops, or damaged batteries in a parked vehicle while you wait for an
appointment. Keep your controlled container in a dry indoor area until
handoff.
If your office spans Phoenix, Tempe, Glendale, or Mesa, group devices
by location and record where each batch originated. One pickup may
combine sites, but the paperwork should still tell you what came from
where. This becomes helpful when a missing serial number appears
later.
Property managers and schools should plan access, loading space, and
staff presence. A secure pickup cannot fix an unlocked closet or an
uncounted pile. Prepare the manifest while the equipment is still in
your control.
Common mistakes and the
better move
Mistake: Trusting a format command as proof. A
format may prepare a drive for a new file system without providing the
required sanitization assurance. Use a documented method that fits the
media and verify the result.
Mistake: Treating all drives like magnetic HDDs.
SSDs and NVMe devices need solid-state-aware handling. Degaussing is not
a solution for flash storage. Ask how the provider handles each media
type.
Mistake: Destroying the whole computer without checking for
batteries. Devices may contain lithium-ion cells that require
separate handling. Tell the recycler what is inside, especially if a
battery is swollen or damaged.
Mistake: Claiming recovery is impossible after an
error. A dead interface or failed controller may leave readable
chips. Keep the drive secured and use the failed-media path.
Mistake: Sending a box with no list. Without a
count, you cannot reconcile the pickup with the processing record. Even
a basic list of device types and quantities improves accountability.
Mistake: Assuming every drive should be destroyed.
Some working equipment may be suitable for reuse after appropriate,
verified sanitization. Make the decision based on risk and purpose, not
habit.
Mistake: Choosing on price alone. Ask what the quote
includes and what paperwork follows. A low price with an unclear data
process can become an expensive question later.
There is a quiet benefit to doing this properly. You can explain the
decision to a colleague, a family member, or an auditor without
reconstructing a month of emails. The process becomes repeatable the
next time a closet fills up.
What
responsible recycling looks like after the data step
Once the data outcome is settled, the remaining device still contains
usable materials and components. Some equipment can be evaluated for
reuse. Other items are separated for materials recovery through an
appropriate electronics recycling stream.
Do not combine the words “secure” and “recycled” as though they mean
the same thing. Secure describes how information was protected.
Recycling describes what happens to the physical equipment. A good plan
covers both questions.
If you have working business equipment, discuss reuse and value
recovery before requesting destruction. If the device is damaged or
obsolete, ask how it will be processed. Asset value and data risk can be
considered together without sacrificing either one.
JHI Scrap’s ITAD
guide to secure, sustainable disposal offers a broader view of
retirement choices. It can help a business plan beyond one box of
storage media.
For local help, JHI Scrap works
with Phoenix-area electronic surplus and IT assets. Confirm the exact
service, pricing, and records available for your project. You can also
view JHI
Scrap on Google Maps before arranging an appointment.
Three disposal
situations, worked through
These examples show why a single blanket rule fails. Each starts with
the same question: do you still need the data? The answer changes the
next step more than the drive’s age does.
A laptop used for personal
banking
Suppose your old laptop starts normally and has an internal SSD. You
have a working backup and plan to donate the laptop. First confirm that
the backup includes your documents and browser exports you intend to
keep. Then identify the storage and follow the device maker’s supported
sanitization procedure.
If the laptop used full-disk encryption, check when encryption was
enabled and what the reset actually does. A procedure that removes
encryption keys may be appropriate when those keys protected all target
data. If you cannot establish that history, do not rely on a reassuring
button label alone.
Finish by checking the process report and the device’s setup state.
Remove account ties that could lock the next owner out. The goal is a
useful computer for someone else and a defensible answer about your
information.
A box of mixed
drives after an office move
Now imagine a Phoenix company finds 70 loose drives after moving
locations. Some are SATA HDDs, some are M.2 SSDs, and several have no
labels. The fastest mistake is to send the entire box away as “hard
drives.”
Count the media and make separate groups by type and condition. Match
serial numbers to retired equipment where possible. Mark unknown drives
for the more cautious treatment your policy requires. Decide whether any
data must be preserved because of a retention rule or unresolved
matter.
Ask the provider to describe the outcome for each group. A serialized
manifest may be more useful than a simple weight ticket. Reconcile the
returned records against your list and investigate every missing or
mismatched item. That is the difference between a disposal event and a
closed project.
A failed NVMe drive from a
server
A server reports a drive fault. The NVMe module no longer appears in
the normal management tool, and the system runs on a replacement. Before
disposal, check whether the missing data exists elsewhere and whether
the original must be retained.
If recovery is unnecessary, mark the module as failed and keep it in
controlled storage. Do not record a successful erase that never
happened. Follow your approved physical destruction path and link the
final evidence to the server asset record.
If recovery might be necessary, stop the disposal clock. A recovery
specialist may need the drive in its current state. Destruction can
happen after the data owner closes that decision, but it cannot be
undone.
A short handoff note
you can actually use
A good handoff message names the media, condition, and desired
result. You do not need a long technical memo. Clear details help a
recycler explain the right service and quote it accurately.
Try this: “We have eight working 2.5-inch SSDs and three failed M.2
NVMe drives. The working devices can be reused after verified
sanitization. The failed devices must be destroyed. Please confirm
pickup terms, documentation, and how you handle the failed media.”
For a household, shorten the note: “I have one laptop with an SSD and
an external drive. The laptop works, but the external drive will not
connect. What are your appointment requirements and data handling
options?”
Keep a copy of the response. It records what you asked for before the
devices left your possession. If the proposed process changes at pickup,
pause and agree on the new handling before handing anything over.
SSD, NVMe, and
failed-drive disposal FAQs
Can I recycle an SSD without wiping it?
You should decide on data protection before recycling it. If the drive
cannot be sanitized and verified, keep it secure and arrange suitable
destruction. Recycling the remaining materials comes after the data
step.
Does a factory reset securely erase an NVMe drive?
Not automatically. Results depend on the device, encryption state, reset
procedure, and whether it finishes. Follow the manufacturer’s supported
instructions and your policy, then verify the outcome or choose another
approved method.
Can data be recovered from a failed SSD?
Sometimes. Failure can affect the controller or interface while data
remains on flash chips. Do not treat a failed connection as proof of
erasure. Seek professional recovery first if you still need the files.
Is degaussing effective for an SSD?
No. Degaussing addresses magnetic storage. SSDs and NVMe drives use
solid-state memory, so choose an appropriate logical sanitization or
physical destruction process instead.
Should I remove the SSD before recycling a laptop?
Remove it only if you can do so safely and your data plan calls for it.
Some laptops have soldered storage or more than one device. If unsure,
tell the recycler the laptop still contains data-bearing media.
What should a certificate of destruction include?
Ask for a record that connects the processed media to your inventory.
Depending on the service, that may include serial numbers, quantities,
dates, methods, and custody details. Confirm the exact fields before
pickup.
Can an unreadable drive go straight into a recycling bin?
No. An unreadable drive can still contain data and needs controlled
handling. Keep it separate, label it, and choose a suitable destruction
path before material recycling.
Does JHI Scrap accept a single drive or offer same-day pickup?
Ask JHI Scrap directly about your quantity, item type, appointment
availability, and service terms. Its Phoenix contact page says public
access is by appointment only. Availability and pricing should be
confirmed before visiting.
The next step for your
drives
The safest route starts with a choice you can explain. Back up needed
files, identify each storage device, and choose a verified method that
fits the media and the data. Keep failed drives secure until they
receive a documented outcome.
For Phoenix-area projects, tell JHI Scrap what you have and what
proof you need. A clear inventory makes it easier to discuss pickup,
reuse, destruction, and recycling. It also lets you retire the equipment
without leaving the data question hanging.
Plan secure drive disposal with JHI Scrap
Have working SSDs, failed NVMe drives, or a mixed office cleanout?
Send the device types and approximate quantities to start a practical
plan. Ask about the data process, documentation, accepted materials, and
pricing before pickup.
JHI Scrap is based at 3334 W McDowell Rd, Unit 17, Phoenix, AZ 85009.
Public visits are by appointment only. Call (602) 272-4033 before
dropping off equipment.